Project Planning
Project Planning Module is to manage projects and its planning like adding resource , skills, milestones etc to the project.
Overview
Project planning module has two views Project Allocation and Gantt.
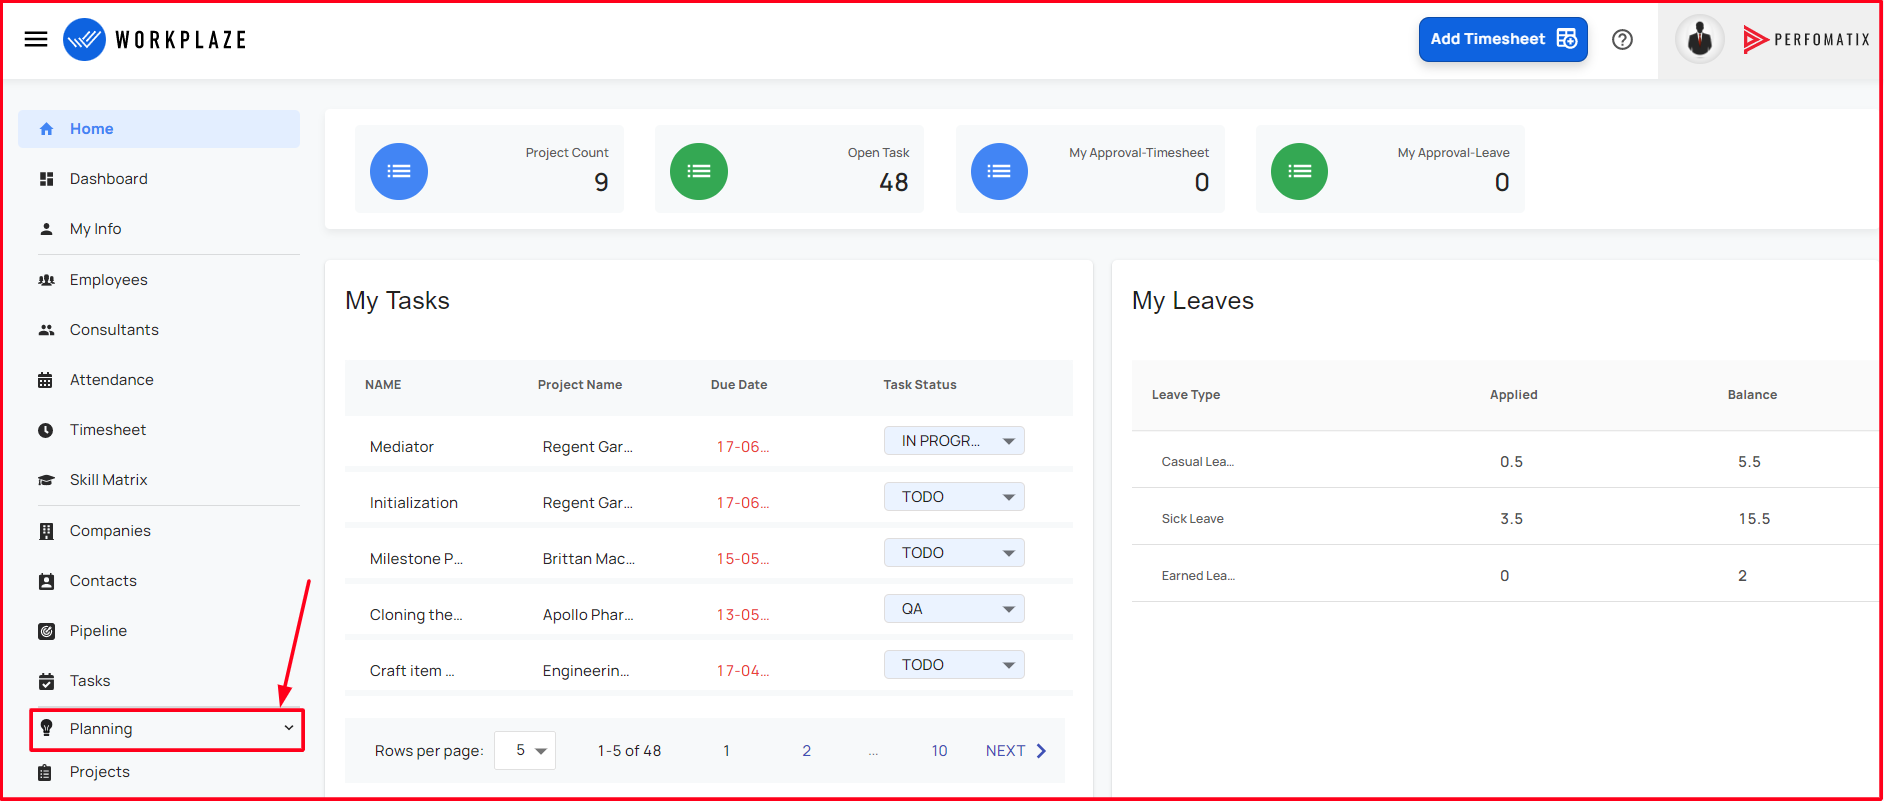
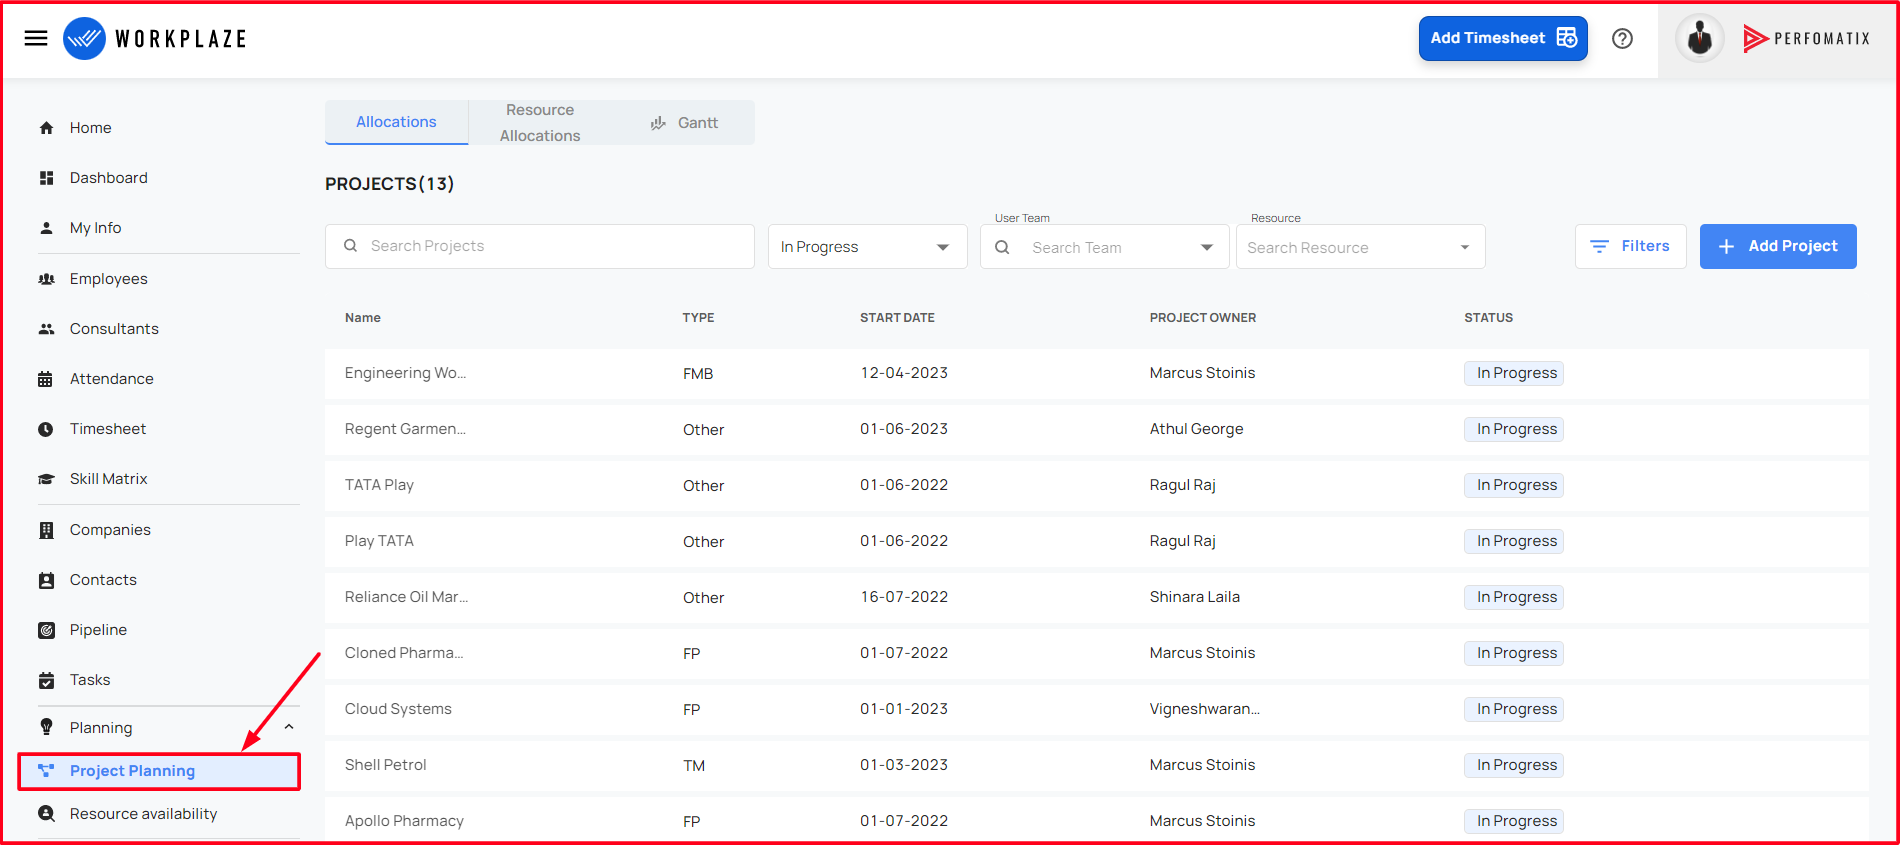
Navigate to the Project Planning
Workplaze → Planning → Project Planning
- The following roles can view and manage this module:
- ProjectManager
- Delivery Manager
- Client Partner
- CXO
- HR MANAGER
- ADMIN
Project Allocation
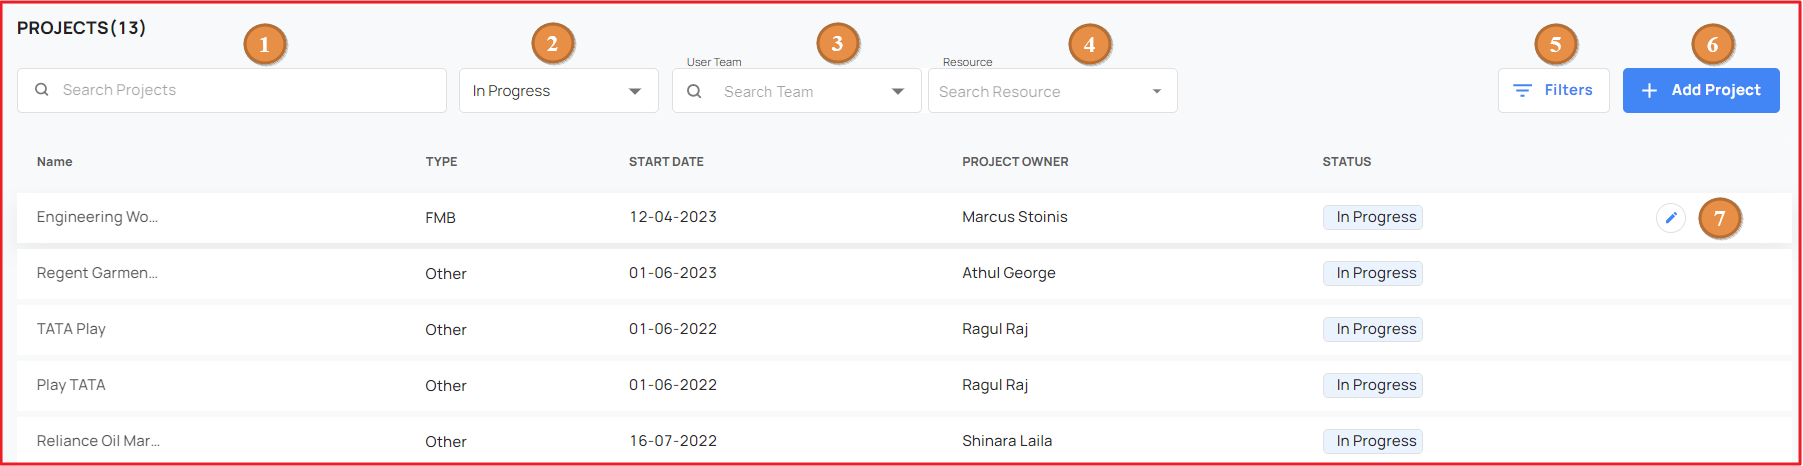
In Allocation view , UI options are
Search Projects
- Projects can be filtered using its name
Status
- Projects can be filtered using its status
User Team
- The User has a feature to filter the projects using the User Team!
Resource
- Projects can be filtered using the allocated resources!
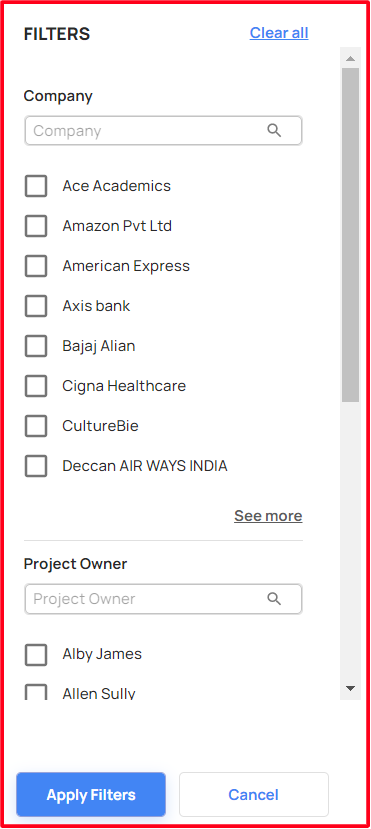
Advanced Filters
When clicking on advanced filter UI will render a drawer with search options like Company, ProjectOwner, ProjectType
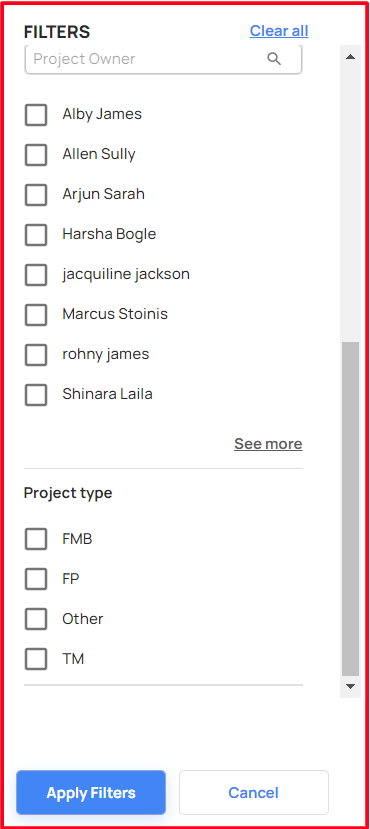
Add Project
When click on the Add Project button, will pops up a form, where user can add details of the project to be added
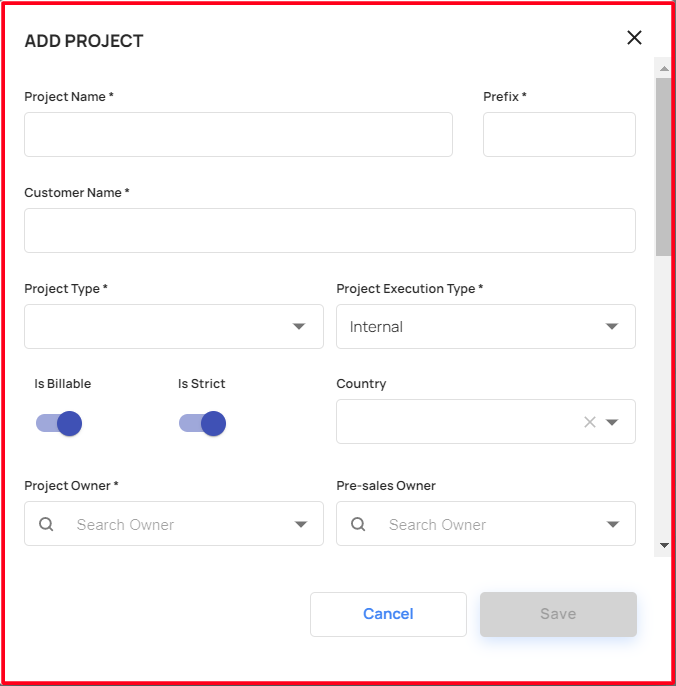
By filling the mandatory fields, the user able to add the project
Edit Project
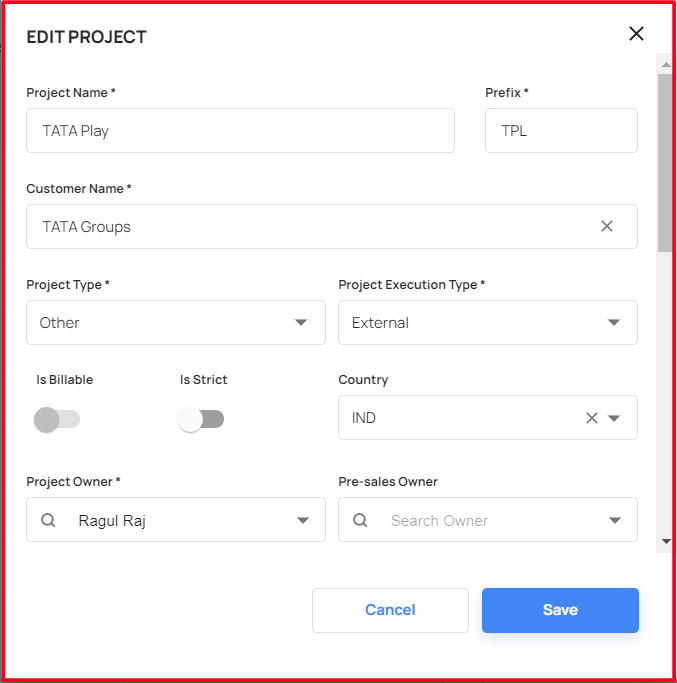
When clicked on the Edit icon at the right hand side of each project, an edit form will pops up.
The user can edit the details of the project added at the time of project addition.
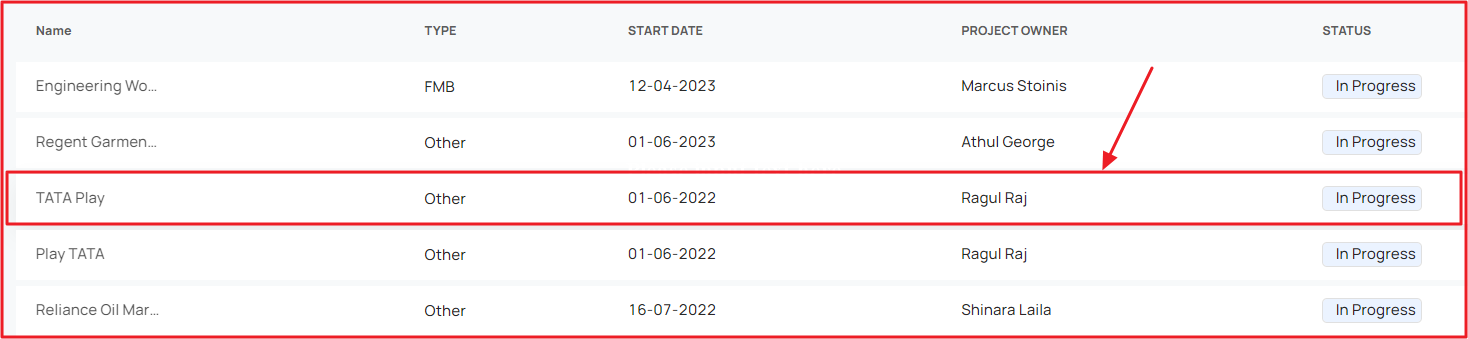
A particular project can be selected from the project list view by clicking on it, which will navigate to project details page.
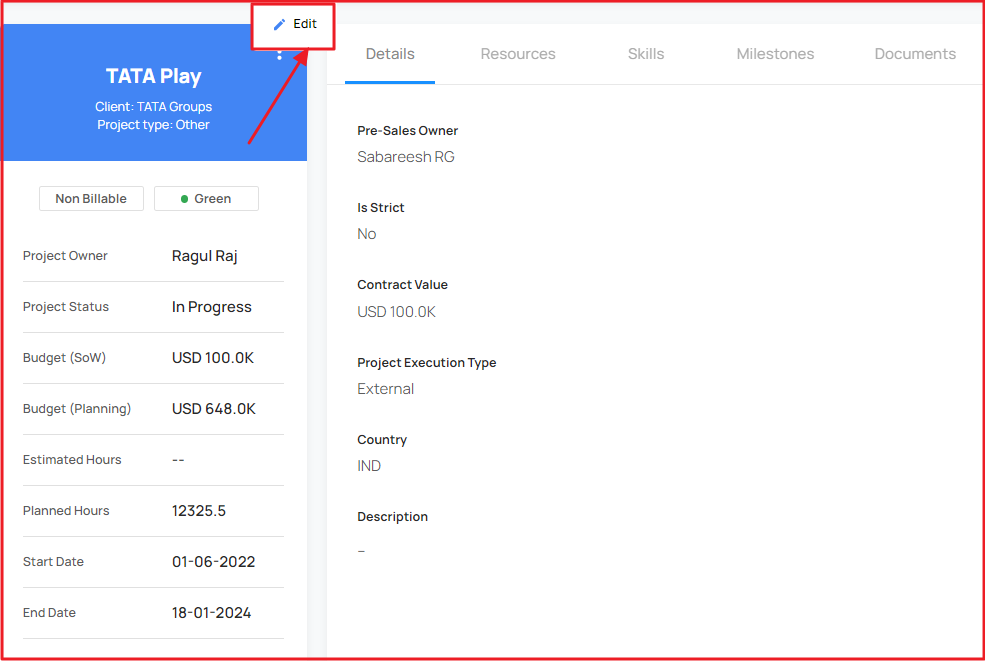
Clicking on the edit button in project details, pops up the above edit details form
In Project details page along with editing the project details, resource skills,milestones and documents of the project can be added
Details
The user able to view the project allocation details, that are updated when the project is created!
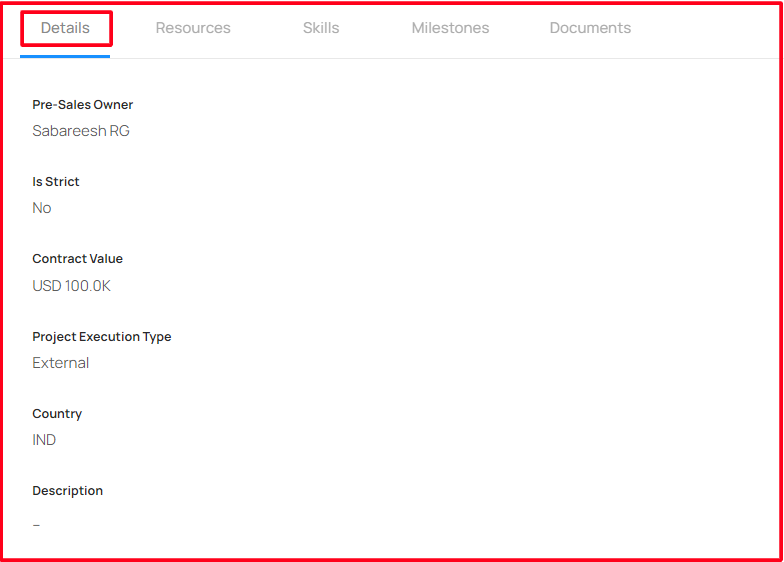
Resource Allocation
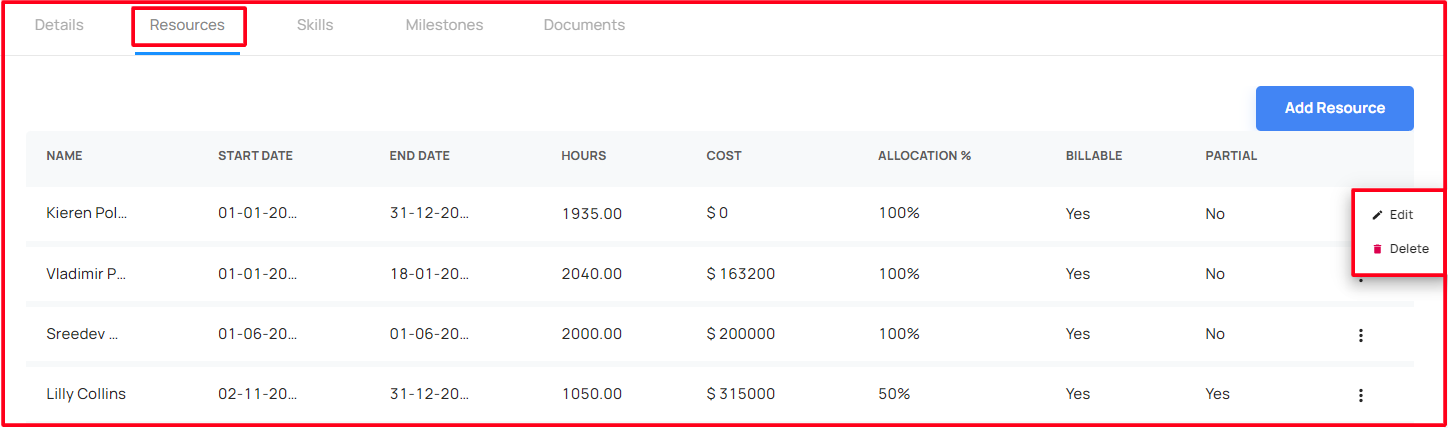
When clicked to the resource, user can see resource list that are allocated to that project
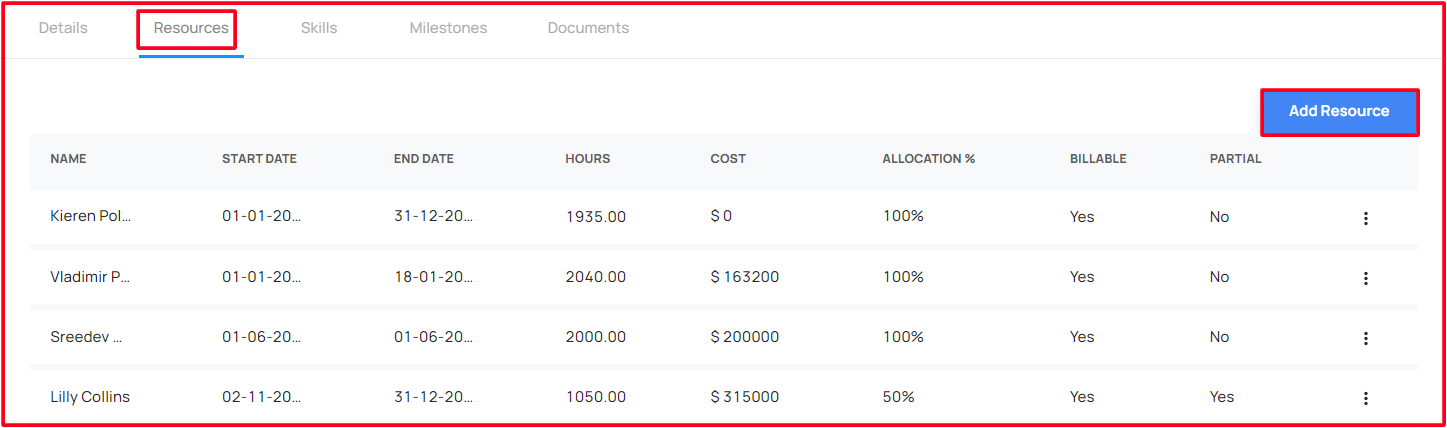
Add Resource
Using the Add Resource button, new resource can be allocated to the project aswell.
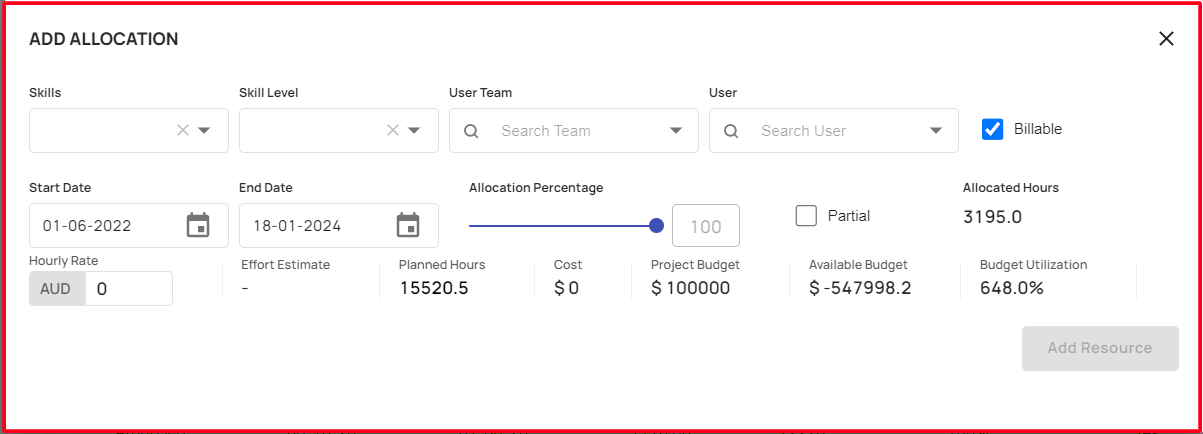
Details in the Add Resource Form
- Skills
- Name of the skill
- Skill level
- Level of the Skill
- User
- Name of the User
- Billable
- Boolean(Whether the resource is billable or not)
- Start Date
- Start date of the resource
- End Date
- End date of the resource
- Partial
- Whether the resource is allocated to the project partially or not
- Allocation Percentage
- If we select partial then the allocation percentage will show drop down (25%,50%,75%)
- Hourly Rate
- User cost based on hour
- Total Hours
- Total hours is based on the business days of the organization
- Cost
- Totalhours * Hourly rate
Edit/Delete the resource allocation
After adding the resource successfully we can see the resource in the resource list
Click on the options in the right corner of the resource will pops up the edit and delete options!
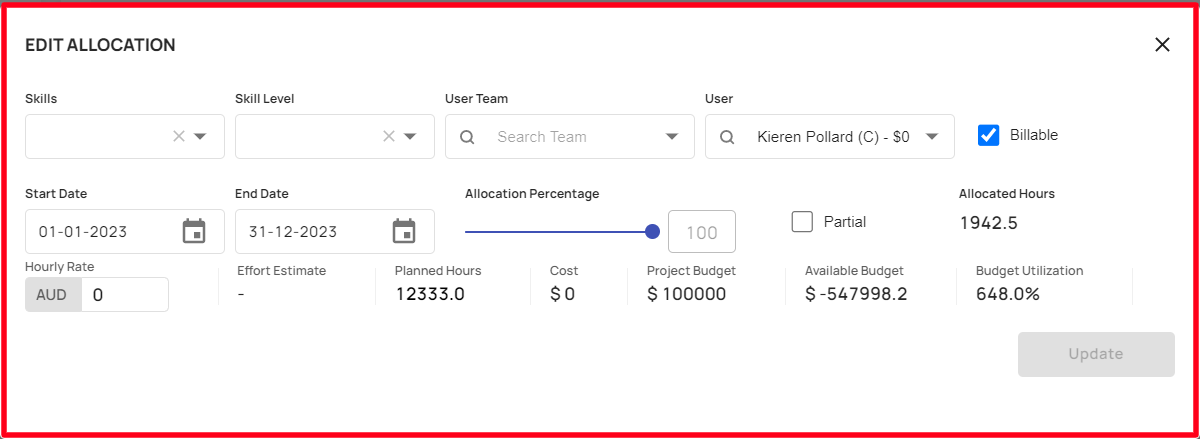
Edit the resource allocation
Click on the edit, the user able to edit the resource allocation!
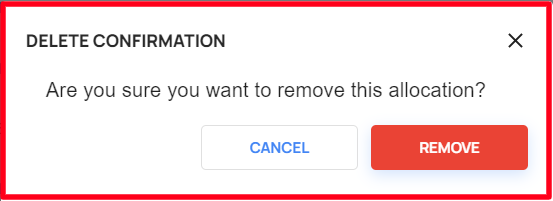
Delete the resource allocation
Click on the Delete option, the user able to delete the resource!
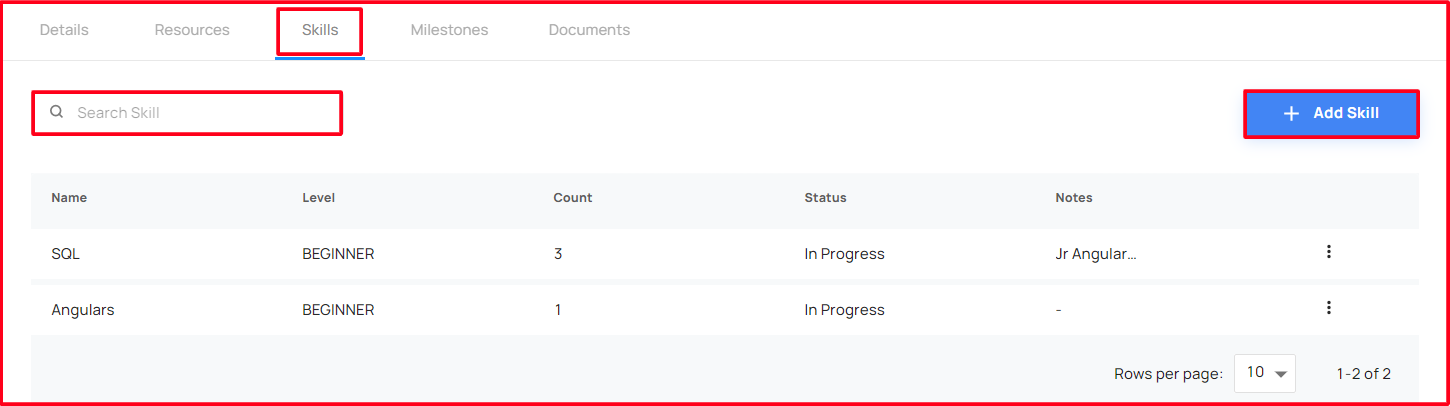
Skills
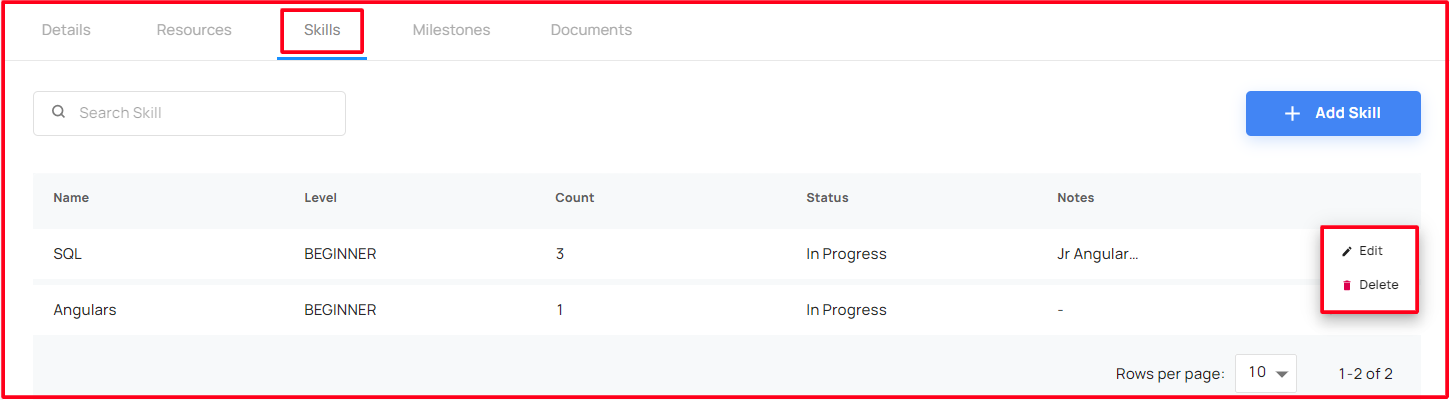
The user able to view the required skill details under the project allocations!
Also the user able to search the skill details!
Add Skills
Click on the Add Skill button, will pops up a window
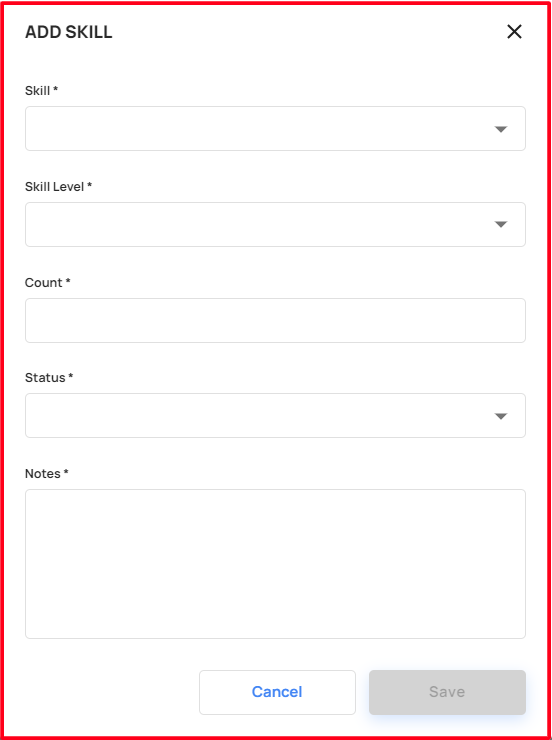
By filling the mandatory fields, the user able to add the skill
Details in the Add Skills
- Skill
- Able to add the required skill
- Skill Level
- Able to add the required level of skill
- Count
- Able to add the required count of resources who having that skills
- Status
- Able to mark the current status of the skill
- Notes
- Able to add the comments about the requirement of the skill!
Edit/Delete the Skill
After adding the skill successfully we can see the skill details in the skill list
Click on the options in the right corner of the skill, will pops up the edit and delete options!
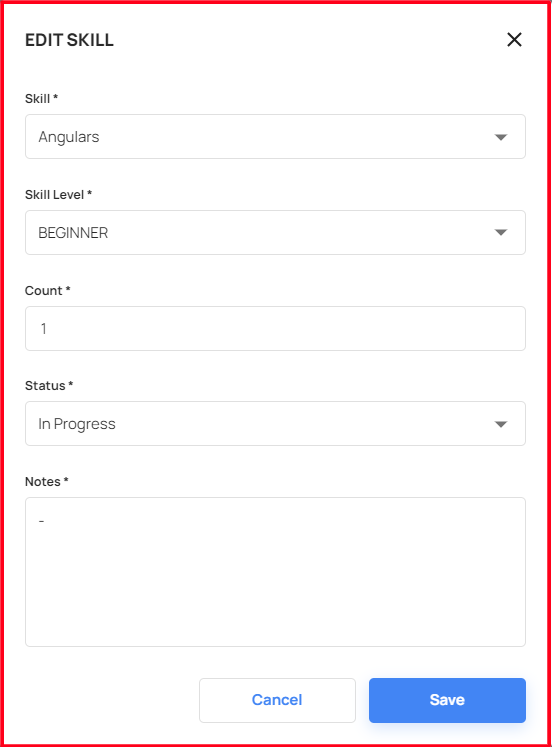
Edit the Skill
Click on the edit, the user able to edit the skill details!
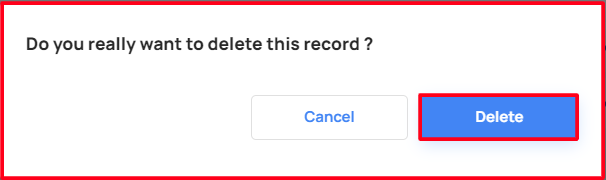
Delete the skill
Click on the Delete option, the user able to delete the skill details!
Milestones
Purpose of milestones are to track various stages of the project
Navigate to Project Details → Milestones
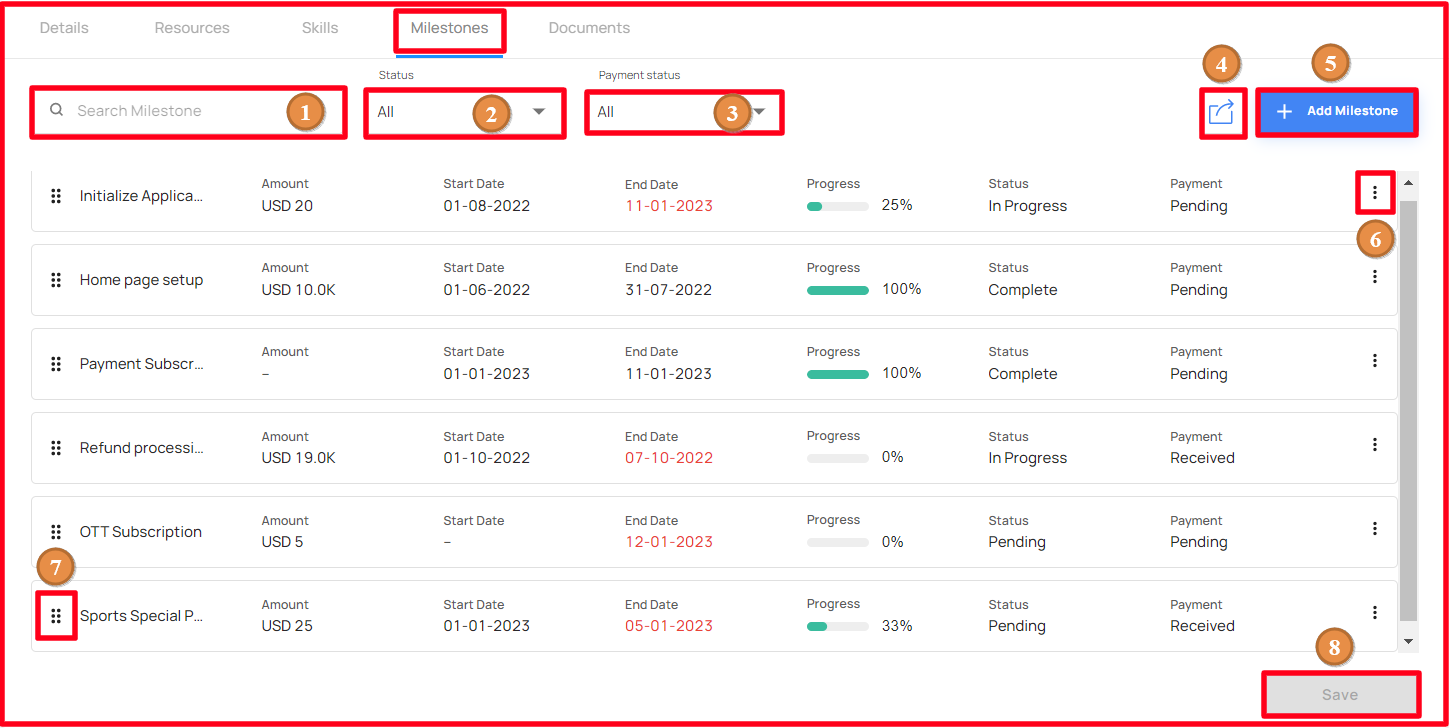
In the Milestone view, UI options are
Search Milestone
- Milestones can be filtered using its name
Status
- Milestones can be filtered using its status
Payment status
- Milestones can be filtered using its payment status
Exports
- The user able to export the milestone details!
Add Milestone
- The user able to add the miletone using the Add Mileston button
Edit/Delete Milestone
Click on the option, the user able to view the edit and delete the milestone option
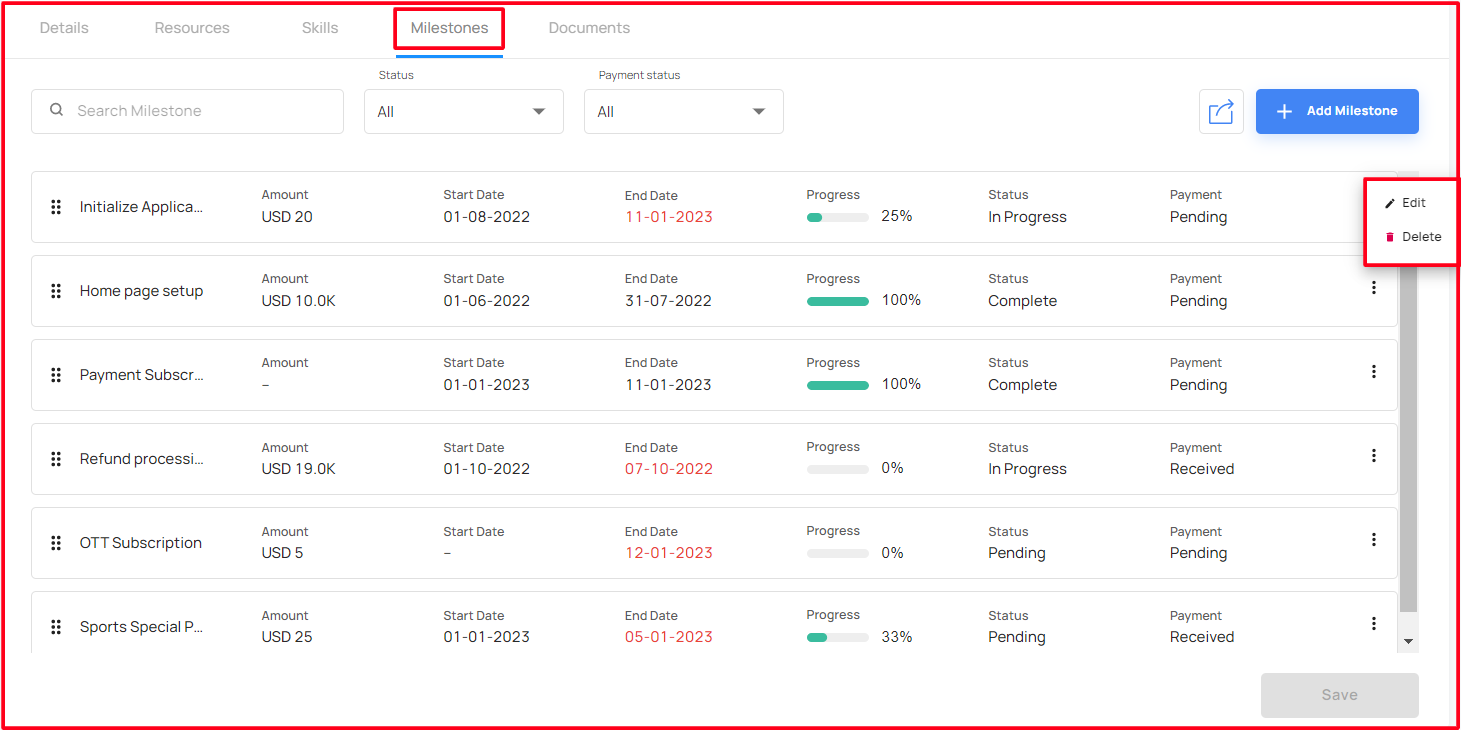
Click on the edit/delete, the user able to edit and delete it!
Note: Milestones cannot be deleted if any project tasks is linked to it
Click and Drag
- The user able to change the milestones order!
- Select anyone milestones and Click & Drag it to the destination!
Save
- After Click & Drag the milestone, the user able to save it or else changes will not saved!
Details in the milestones
The details in the milestone views are followed by,
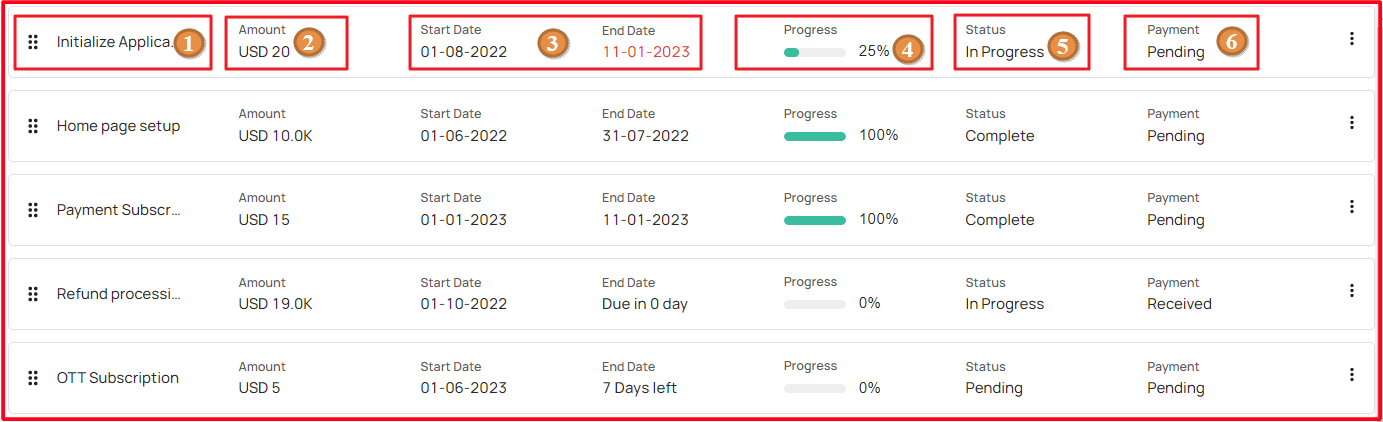
- Milestone Name
- Shows the Name of the milestone!
- Milestone Amount
- Shows the amount of the milestone!
- Milestone Period
- Shows the milestone start date and end date!
- Milestone Progress
- Shows the completed task progress under the milestone!
- Milestone Status
- Shows the current status of the milestone!
- Milestone Payment status
- Shows the payment status of the milestone!
- Milestone Name
Add Milestone
Click on the Add Milestone button will pops a window
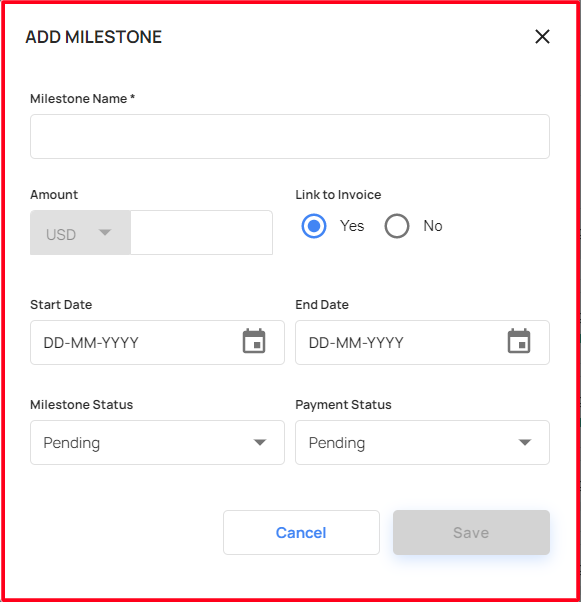
By filling the mandatory fields, the user able to add the milestone!
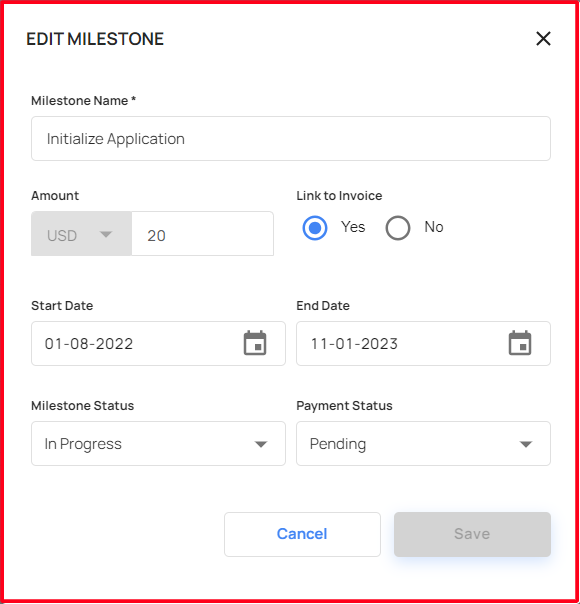
Details in the Add Milestone form
- In the Add Milestone form, UI Options are,
- Milestone Name
- Name of the milestone
- Amount
- Amount of the milestone
- Link to Invoice
- Link this milestone in the Invoice!
- Start date
- Start date of the milestone
- End date
- End date of the milestone
- Milestone status
- Status of the milestone
- Payment status
- Payment status for the milestone
- Milestone Name
Edit/Delete Milestone
Click on the option, the user able to view the edit and delete the milestone option
Edit Milestone
Click on the edit, the user able to edit the milestone details!
Delete Milestone
Click on the Delete option, the user able to delete the milestone details!
Note: Milestones cannot be deleted if any project tasks is linked to it
Gantt
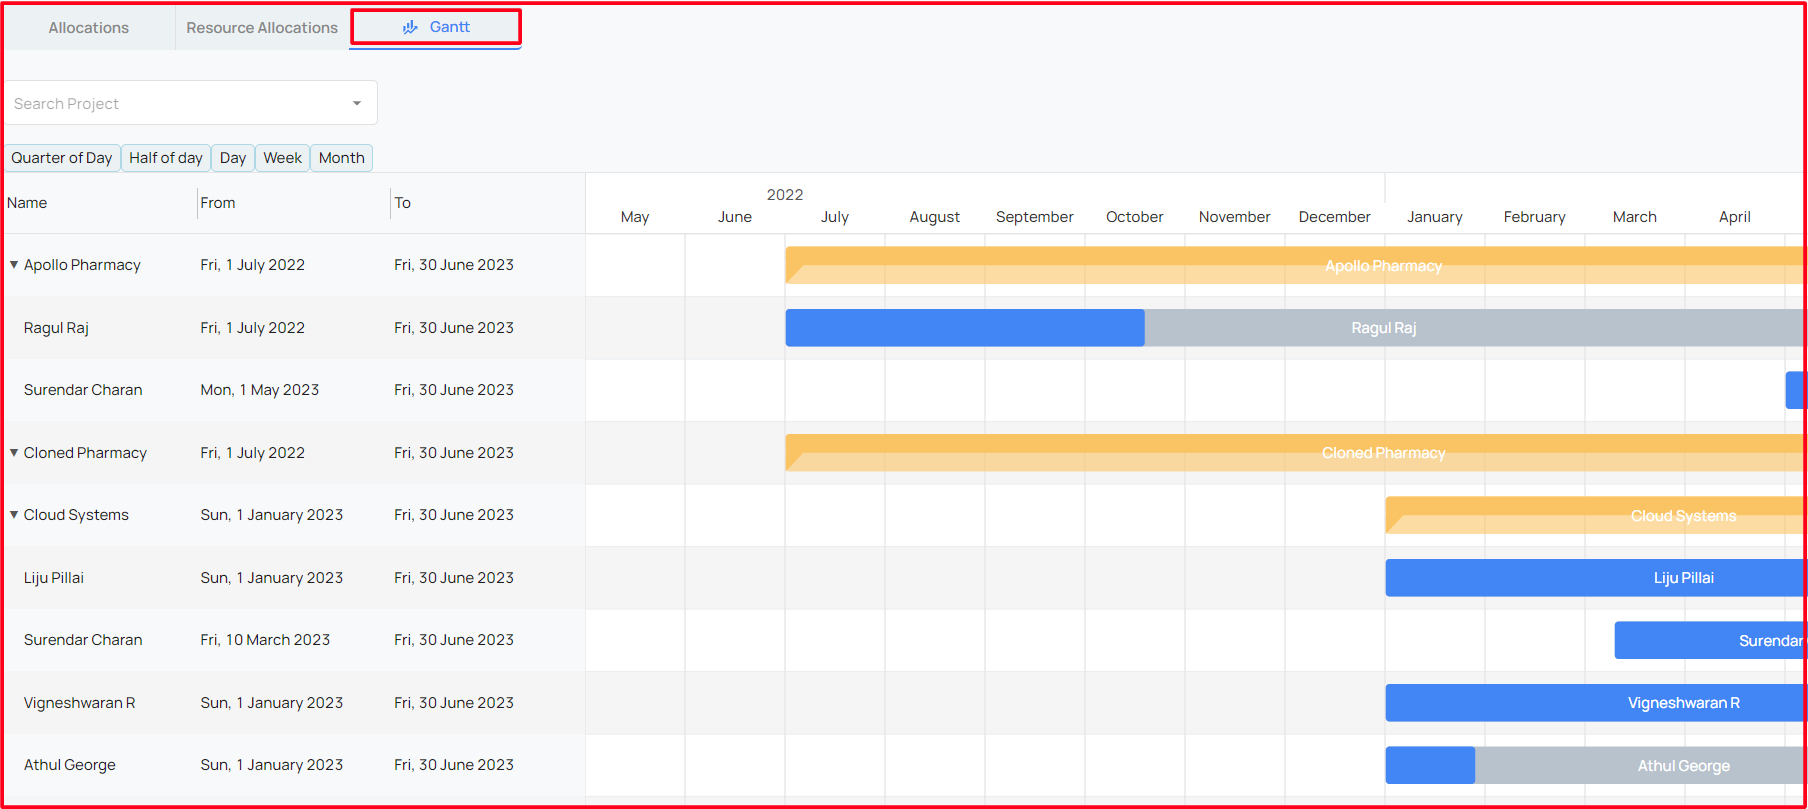
- A Gantt chart is a commonly used graphical depiction of a project schedule
- It's a type of bar chart showing the start and finish dates of a project's elements such as resources, planning, and dependencies
- A Gantt chart is a visualization that helps in scheduling, managing, and monitoring specific tasks and resources in a project
- It consists of a list of tasks and bars depicting each task's progress
- The horizontal bars of different lengths represent the project timeline, which can include task sequences, duration, and the start and end dates for each task
- The user can see the Gantt chart of a particular project by filtering it by its name