Timesheet Module
In the application, timesheet module is used to enter/managing the resources timesheets and view it's status!
Overview
- Timesheet Module
- Overview
- Navigate to Timesheet
- Overtime
- History in Overtime
- Pending Approval in Overtime
- Timesheet Management in Overtime
- Approve/Reject Timesheet in Overtime
- Timesheet Management Popup in Overtime
- Insights
- FAQ
Navigate to Timesheet
Workplaze → Timesheet
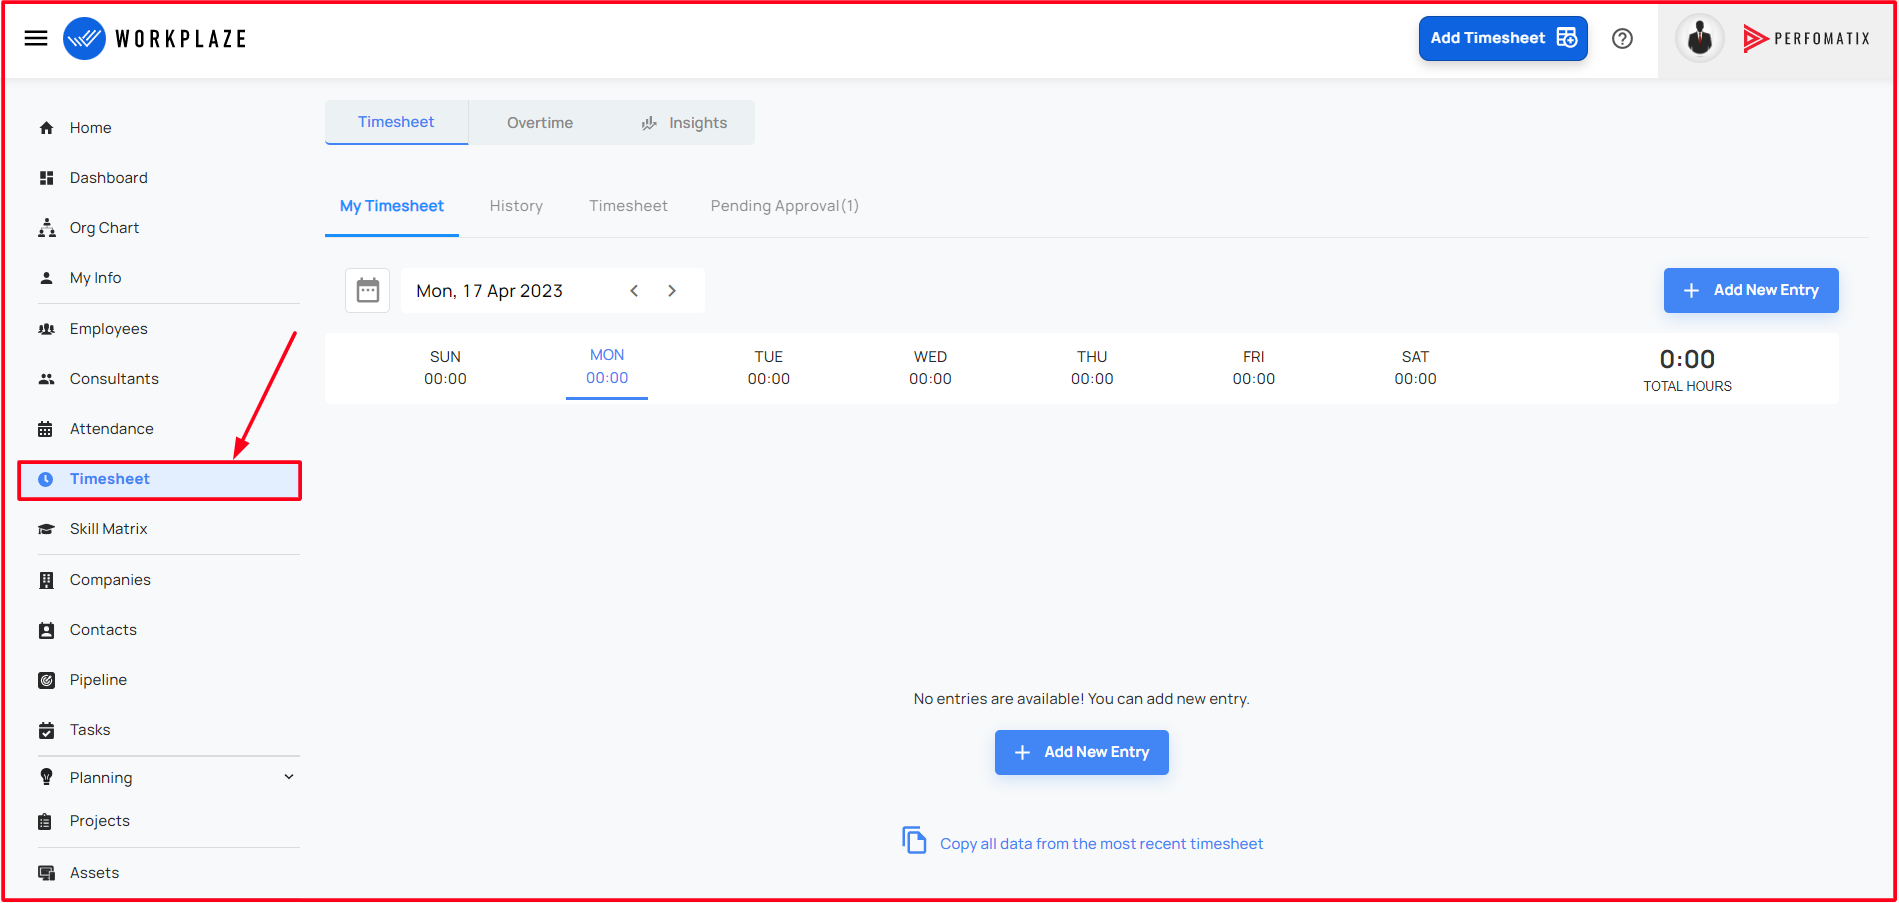
- The user can add the timesheet entries by both day and week wise
Add Timesheet in day view
To add a timesheet by day the user can click the “Add New Entry” button from the top right. Then the user can see the popup form
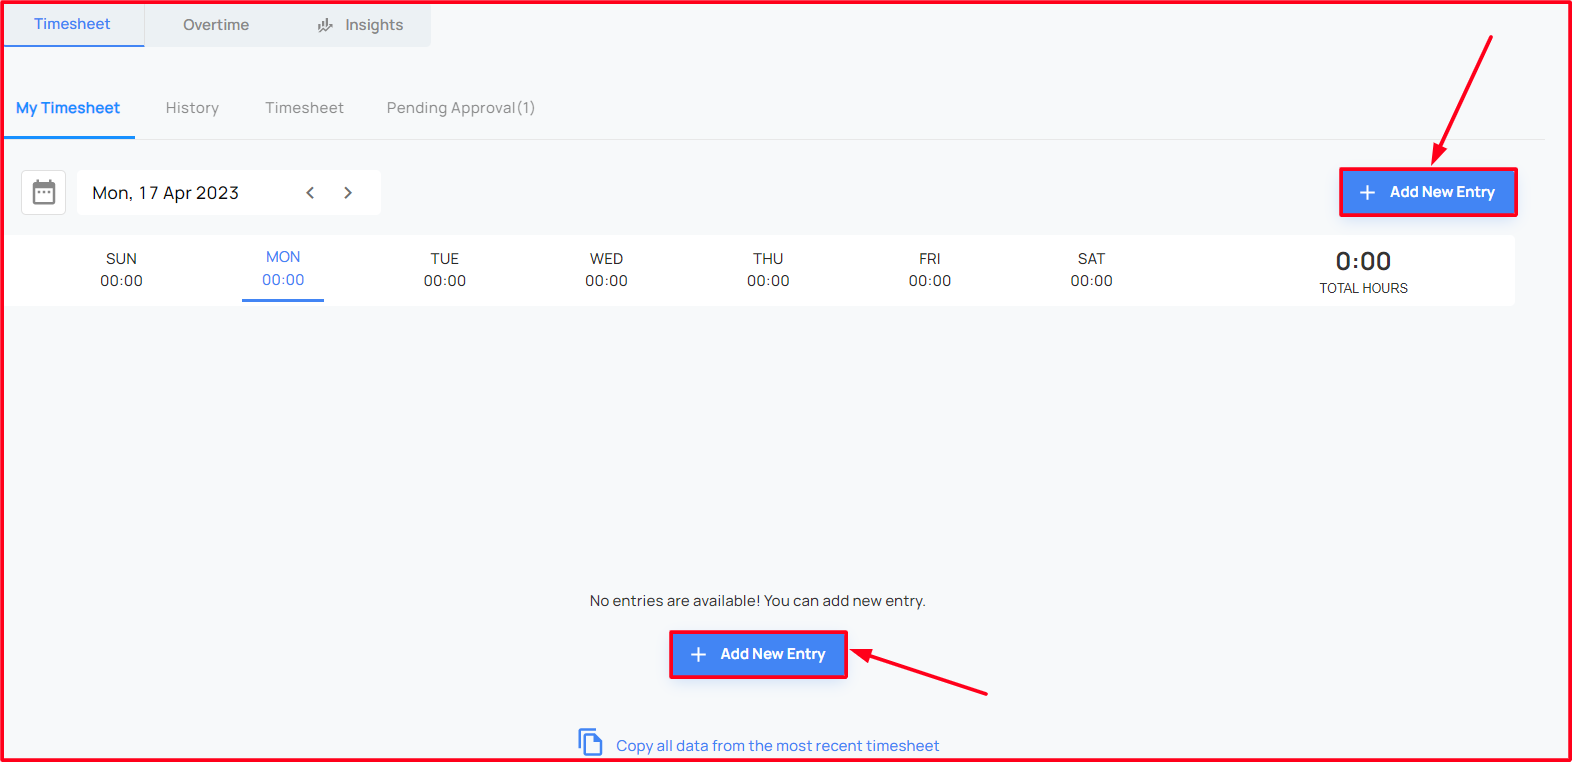
Add Entry Window
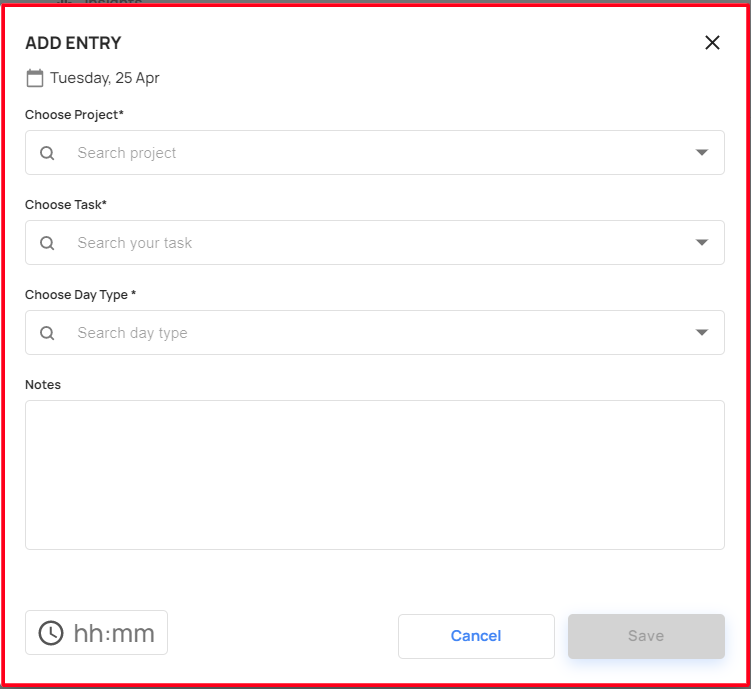
After clicking the “Add New Entry” button the user will see an Add Entry window, please follow the instructions to add a new entry
- Choose Project (Required)
- The user can only see the projects that assigned to the user as a resource
- If there are no projects listed the user can select the “General” option and add time against it
- Choose Task (Required)
- The tasks will list based on what project the user has chosen
- Choose Day Type (Optional)
- The user able to choose the day type
- The user has a feature to add this as mandatory or not
- Notes (Optional)
- The user can enter some notes as remarks
- The user has a feature to add this as mandatory or not
- Hours (Required)
- The user can add hours to this entry, hours should be in this format “hh: mm” and cannot exceed “23:59 hours”
- Choose Project (Required)
Manage Timesheet in day view
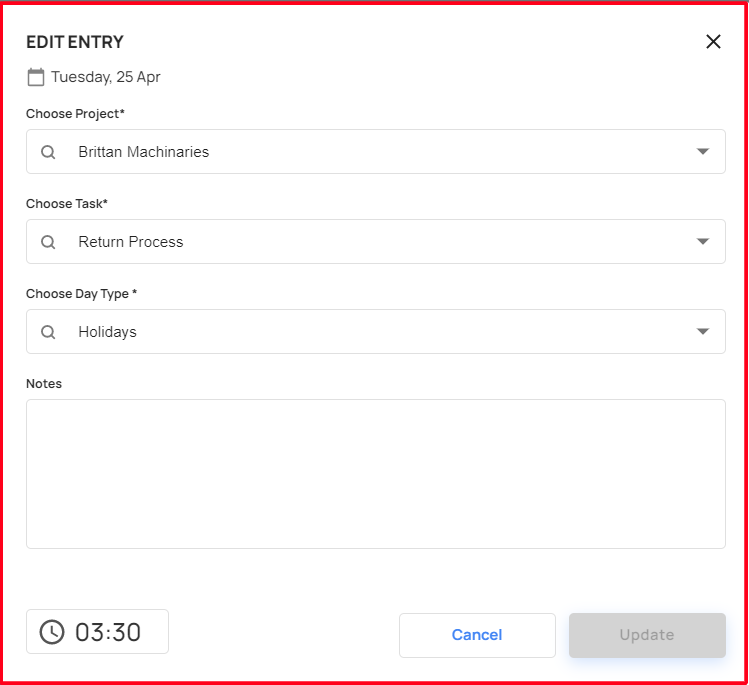
Clicking the three dots button the user will see an Edit option, clicking the edit option edit entry window opened, please follow the instructions to edit the entry
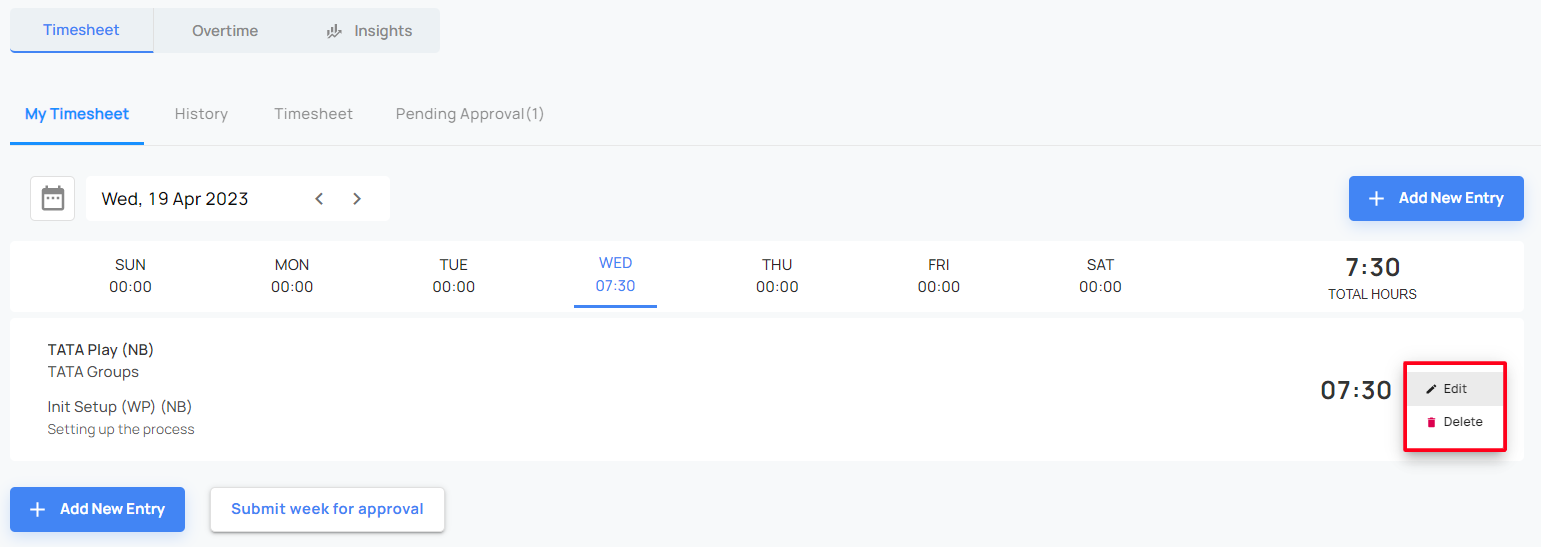
Edit Entry Window
Choose Project (Required)
- The user can only see the projects that assigned to the user as a resource
- If there are no projects listed the user can select the “General” option and add time against it
Choose Task (Required)
- The tasks will list based on what project the user has chosen
Choose Day Type (Optional)
- The user able to choose the day type
- The user has a feature to add this as mandatory or not
Notes (Optional)
- The user can enter some notes as remarks
- The user has a feature to add this as mandatory or not
Hours (Required)
- The user can add hours to this entry, hours should be in this format “hh: mm” and cannot exceed “23:59 hours”
Delete Timesheet in day view
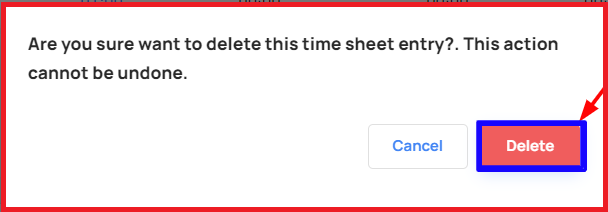
The user can delete an entry by clicking on the three dots from the right, then clicking the delete button
Add Timesheet in week view
The user has a feature to enable/ disable the week view in the Settings
Using this feature the user able to enter the timesheets in the weekly view
To add a timesheet by week the user has to choose the week view from the view selector on the left

Add new week entry
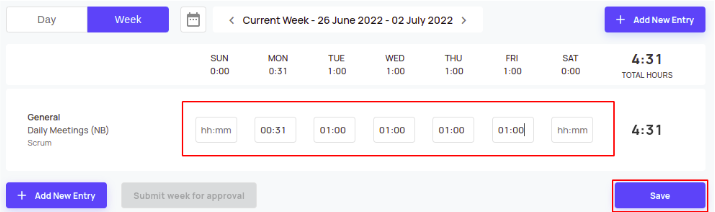
To add a timesheet by week the user has to add an entry by clicking on the “Add New Entry” button the user will see an Add Entry window same as the day entry
After adding an entry the user can input hours each day for the week, then the user can Save
Copy a recent timesheet data
The user can copy all the data from the most recent timesheets
To do this click the “Copy all data from the most recent timesheets” button from the window. It will copy the most recent timesheet to the current week/day

Copied most recent timesheet data
Copied timesheet data will be shown in the current view, the user can save the data
Manage the week's Entry
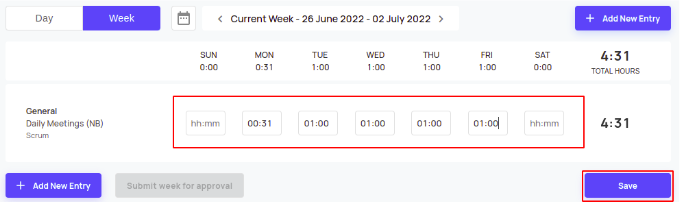
- The user able to view and manage the timesheet week wise!
Delete the week's Entry
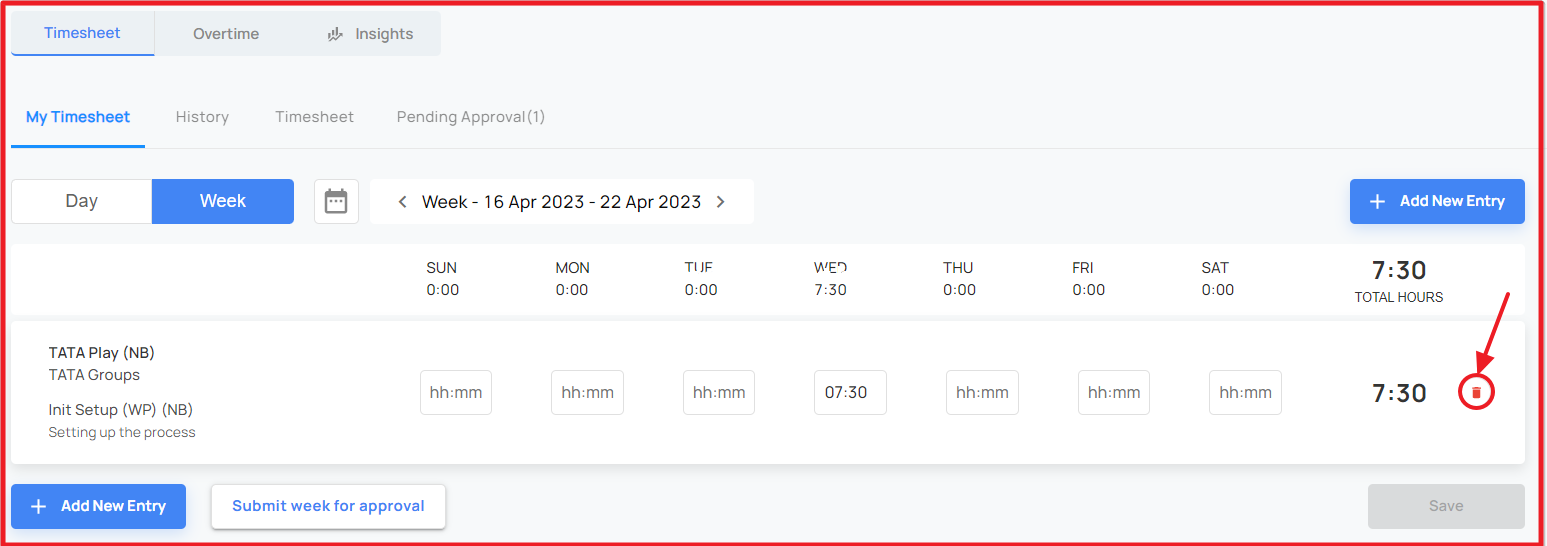
The user can delete an entry by clicking on the delete icon
Submit timesheet
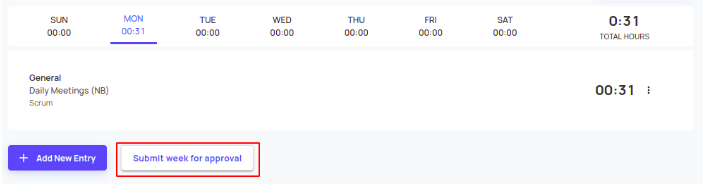
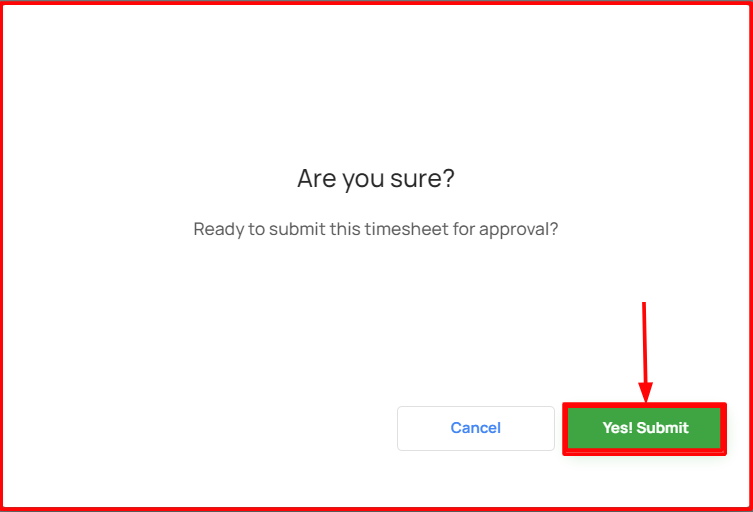
The user can easily submit the timesheet by clicking on “Submit week for approval” in the day/week view
Note: Once the user submits the timesheet then only the system will take hours to calculate
History
Once the user submitted the timesheet, then can view/ track the status of the timesheet in history section.
The user has a feature to enable or disable the draft view
- This draft feature is used to view the not submitted timesheet details which were entered by the user
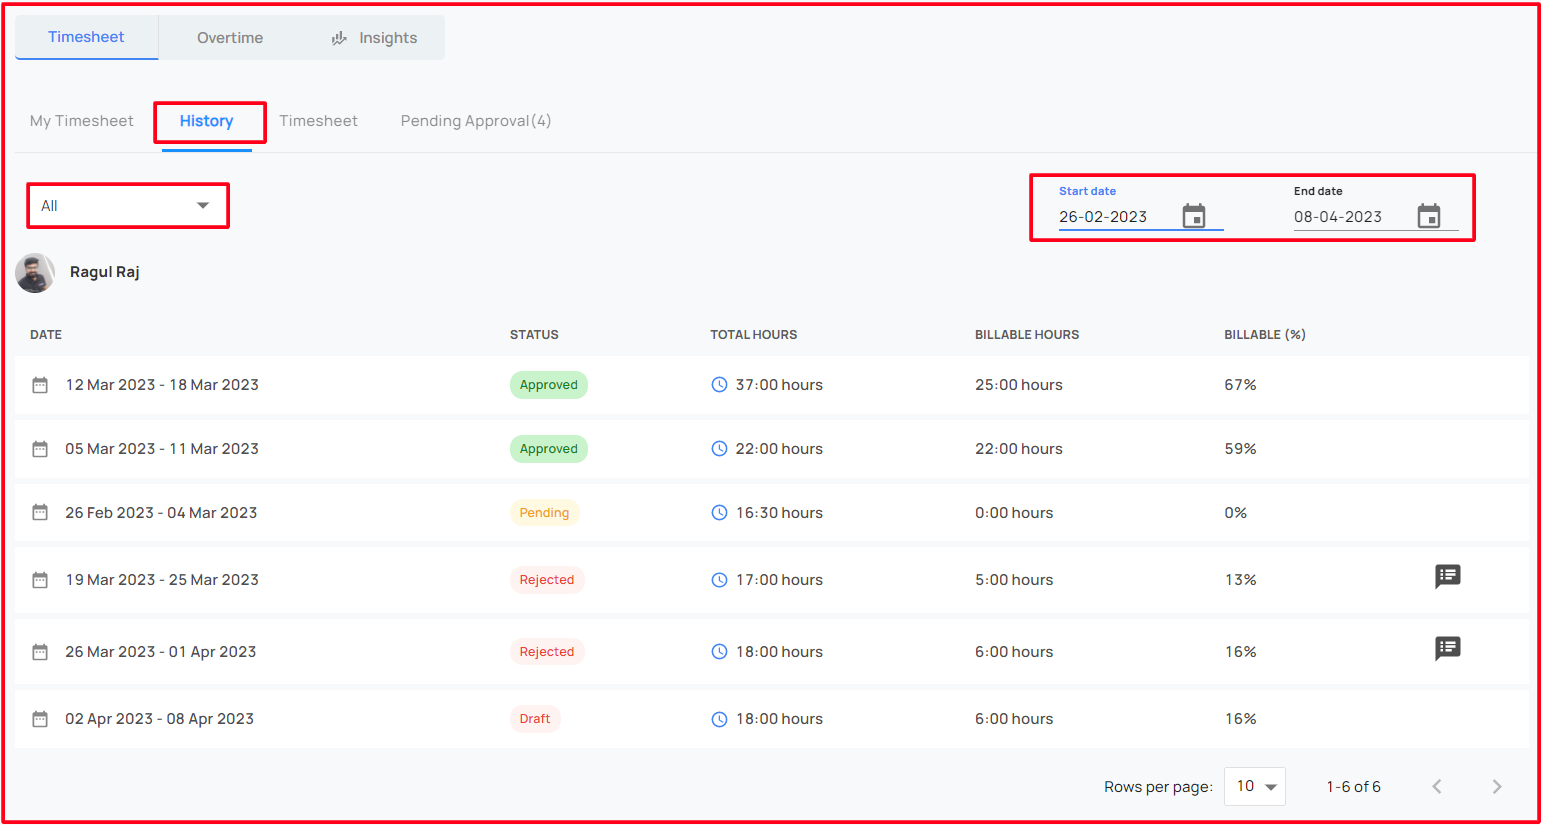
Also the user can view/track the specific status of the timesheet in the history section
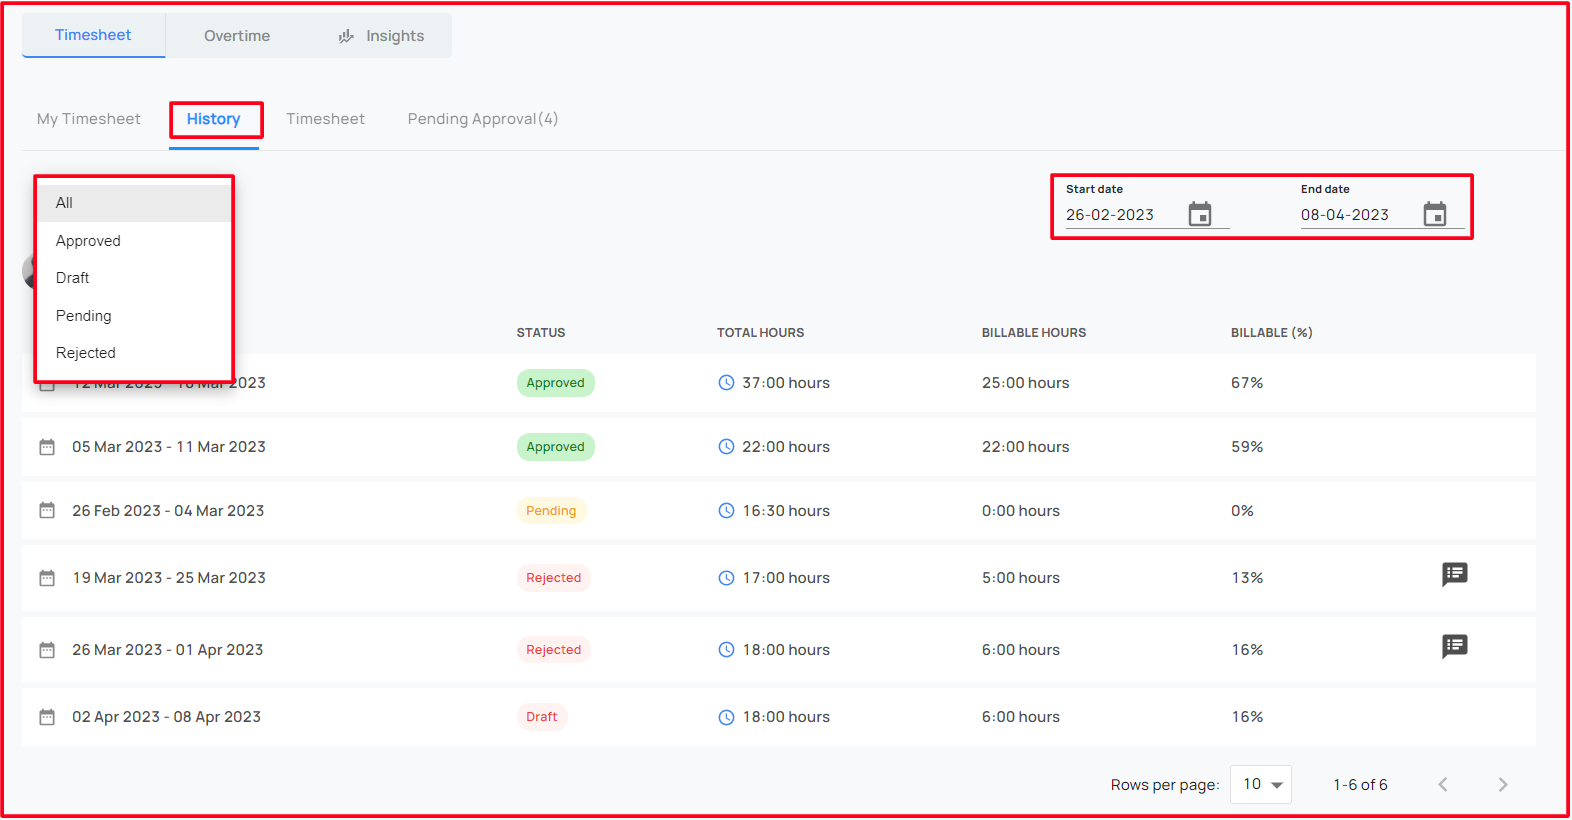
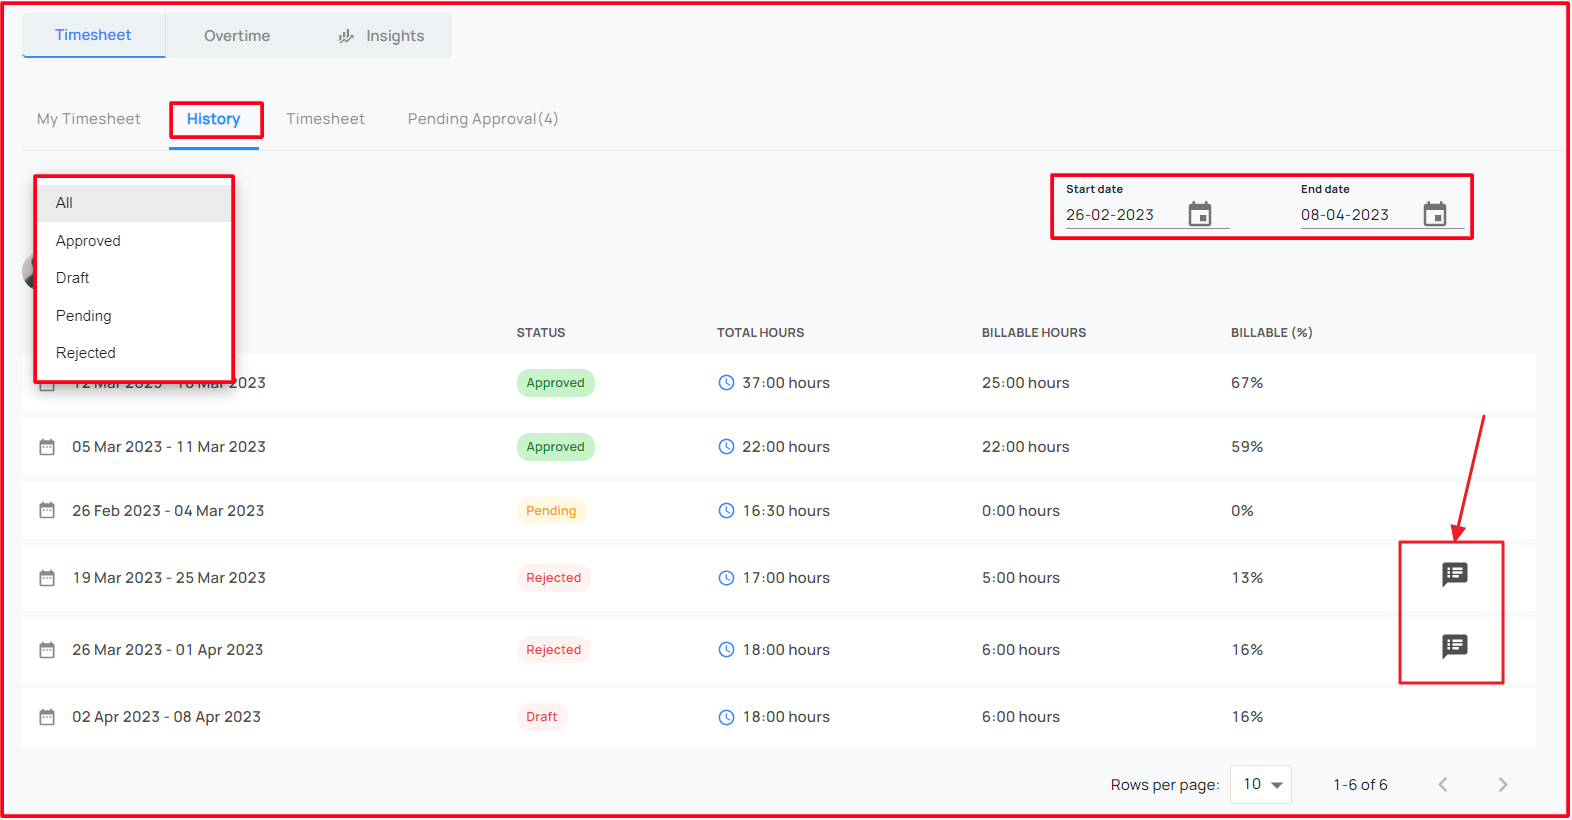
The user able to view the reasons for the rejected timesheet!
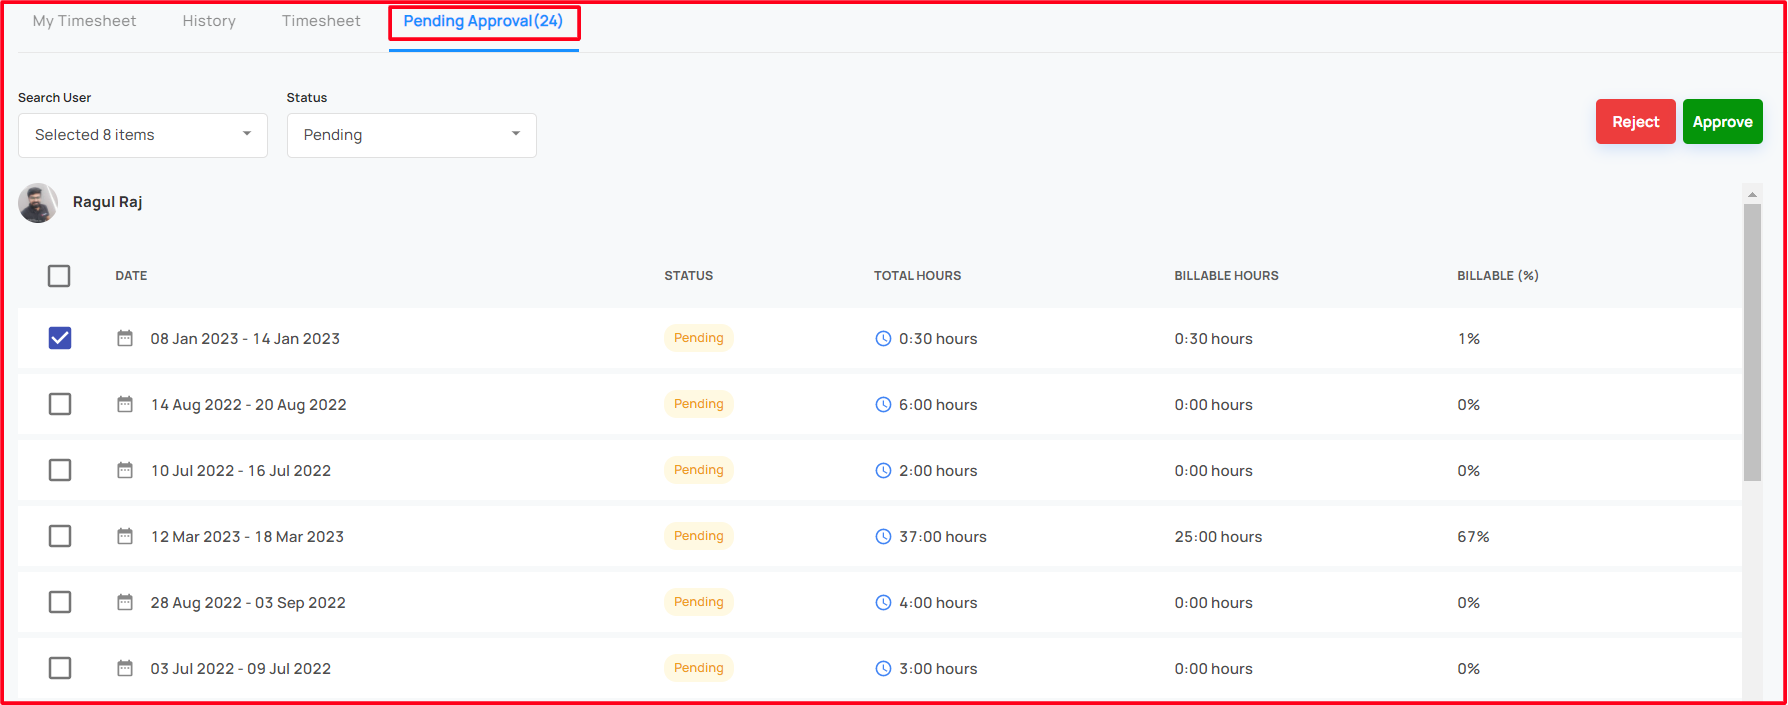
Pending Approval
Once the user submits the timesheet the reporting manager can view the details in the pending approval section. There the reporter can approve/ reject the timesheet
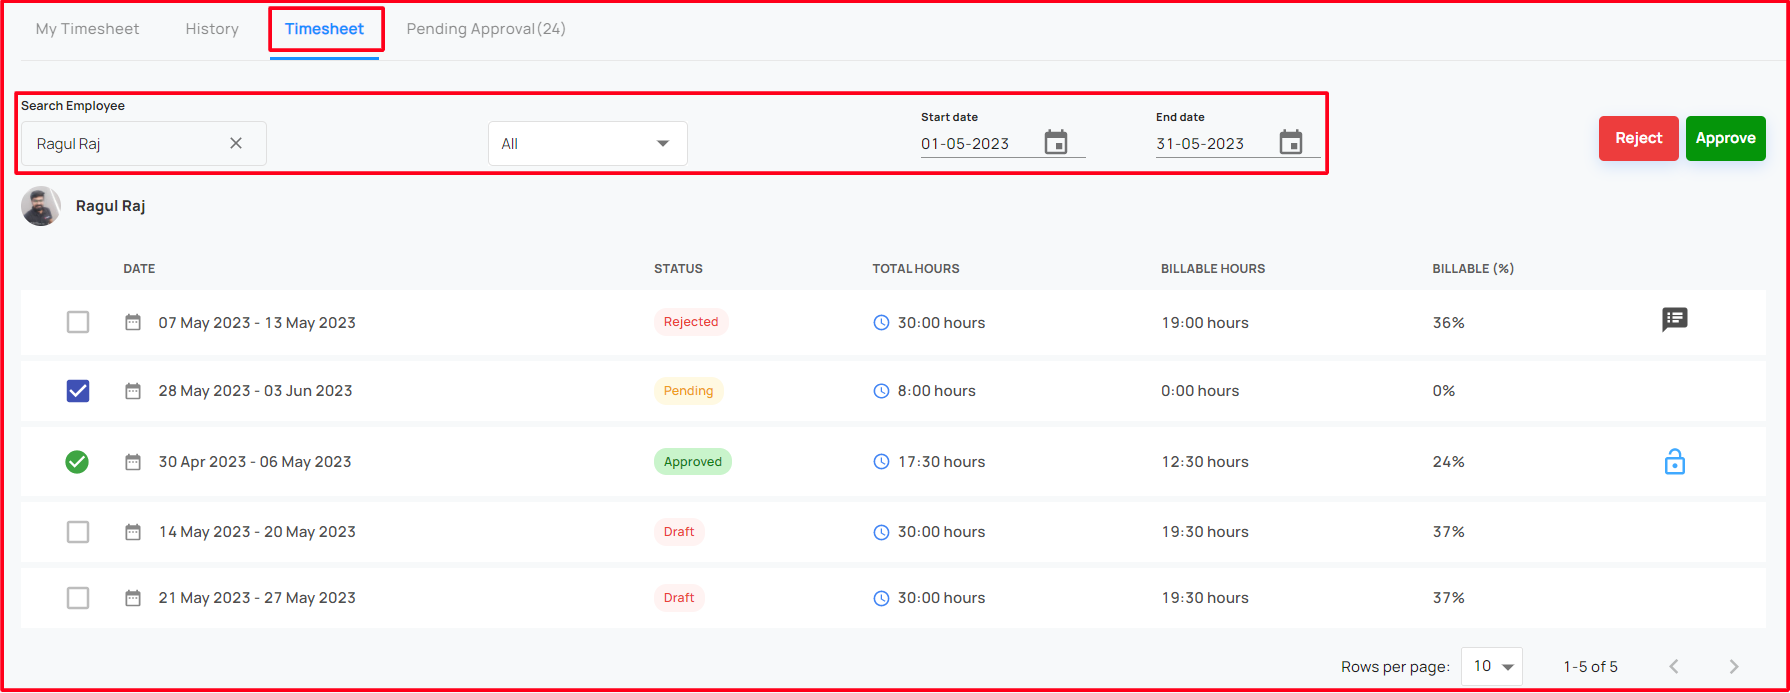
Timesheet Management
The admin also approves or rejects submitted timesheets.
Approve Timesheet
The reporter can click on the timesheet to approve, it will open a popup window
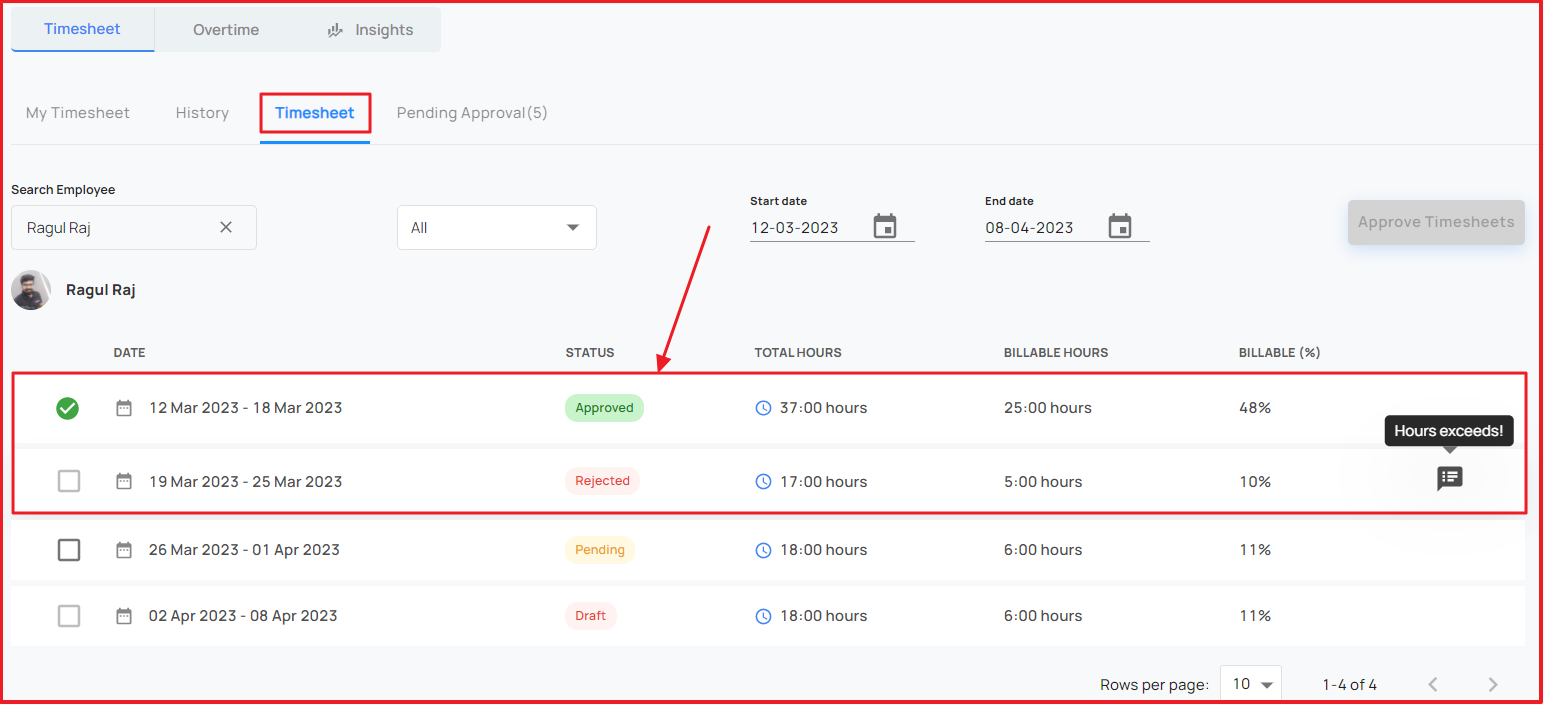
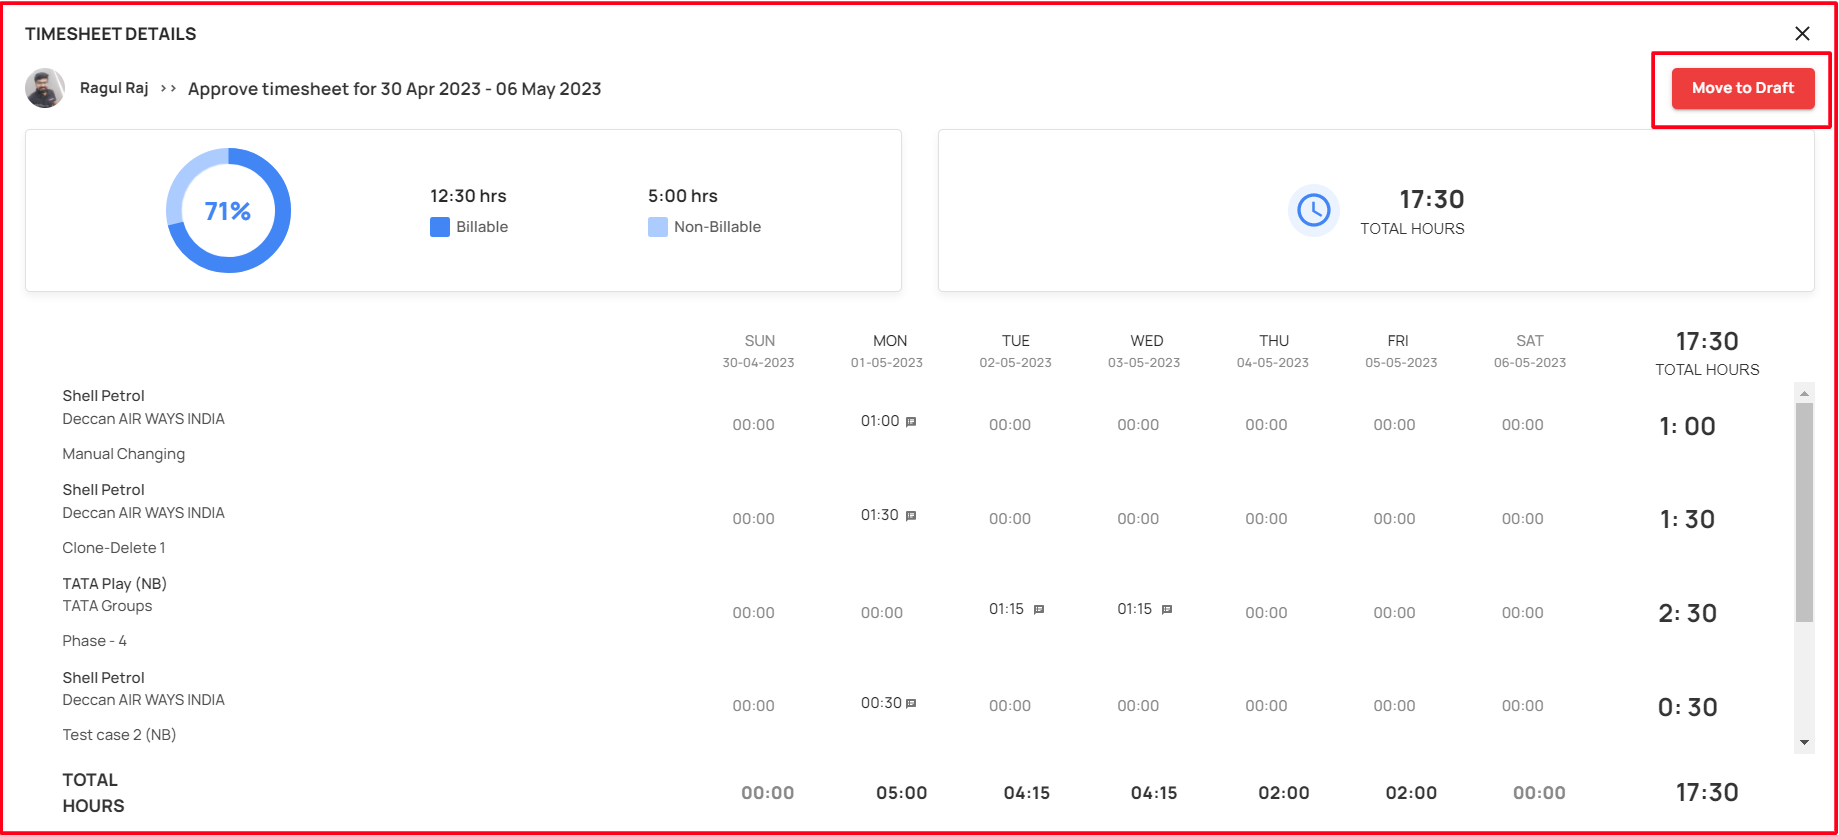
The reporter able to revert the approved timesheets!
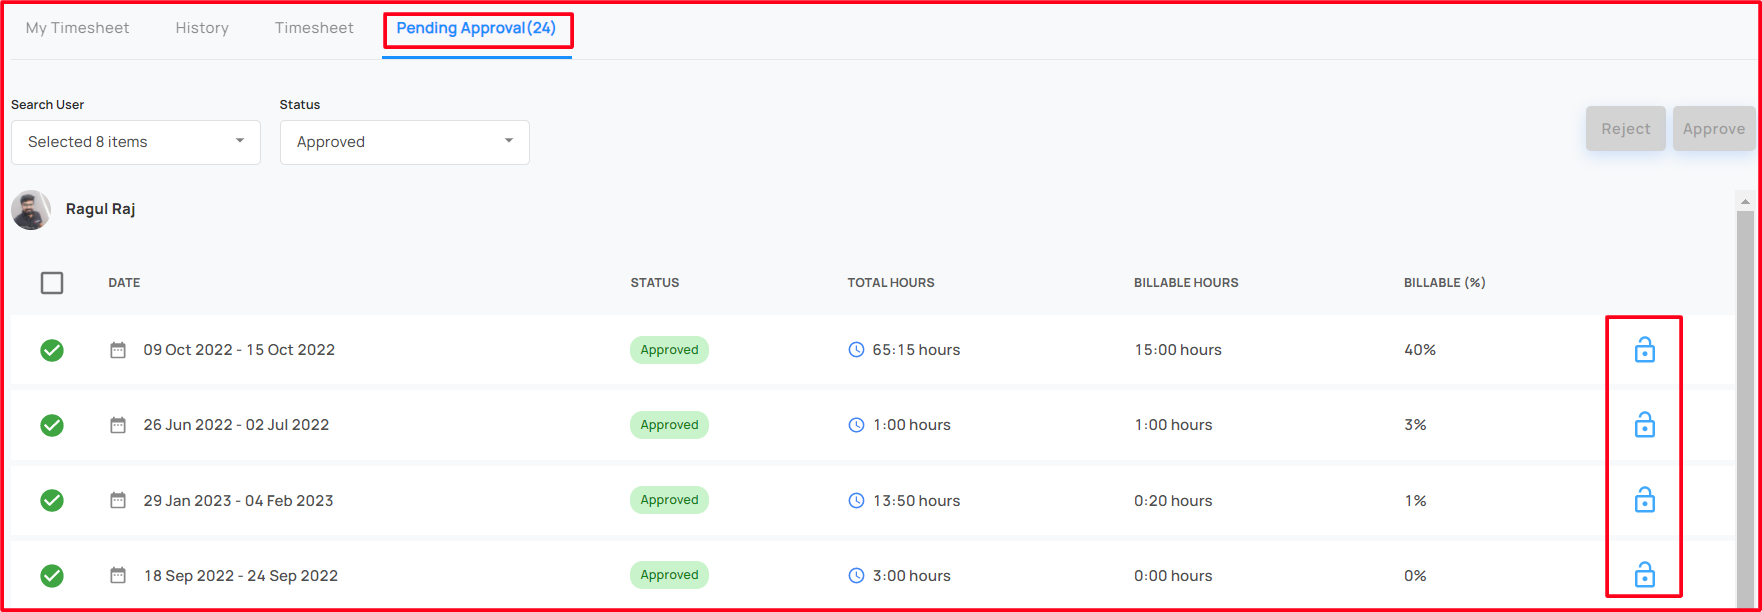
Clicking on the unlock button, it pops up a window to move to Draft confirmation!
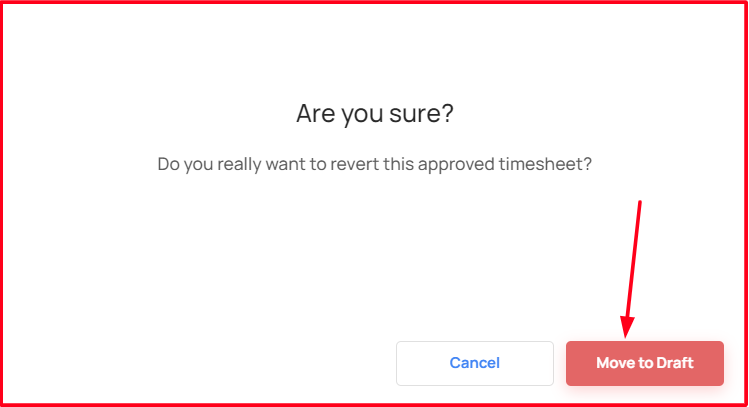
Clicking on the Move to Draft, the user able to revert the approved timesheet, it's moved to Draft and the user receive the mail notification!
Reject Timesheet
The reporter can click on the timesheet to reject, it will open a popup window to reject
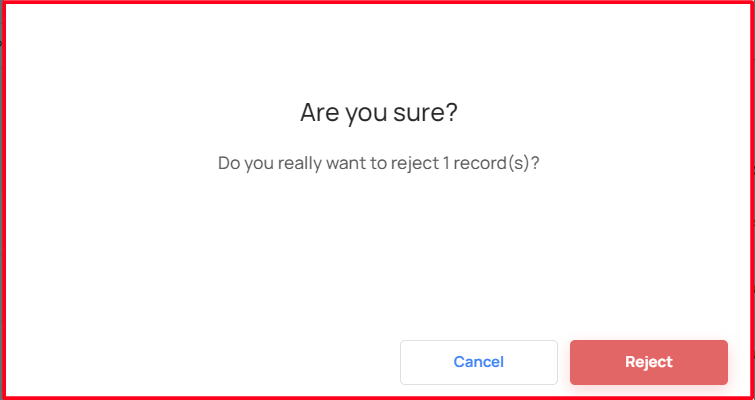
After click the reject confirmation, pops up a window to request a reason for rejection!
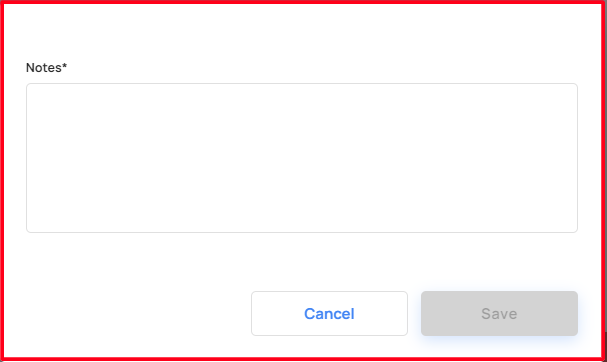
After added the reject reason and save it, the user receive the mail notification!
Also the user and reportee able to view the rejected reasons in the history, and the reportee & Admin also view the rejected reasons!
Timesheet Management Popup
The admin can approve or reject the timesheet from this window
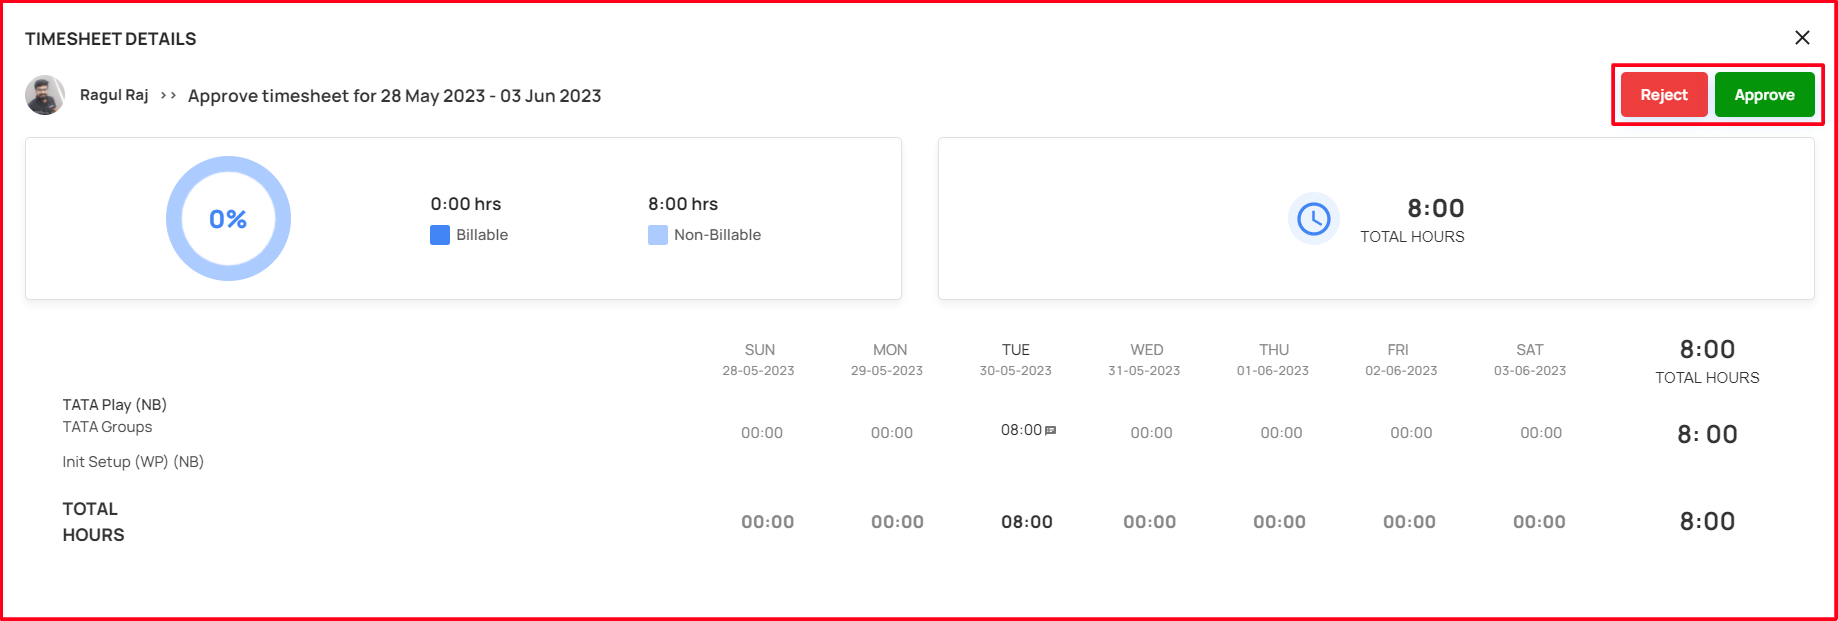
Also, the admin can revert the approved timesheet and move to draft from this window
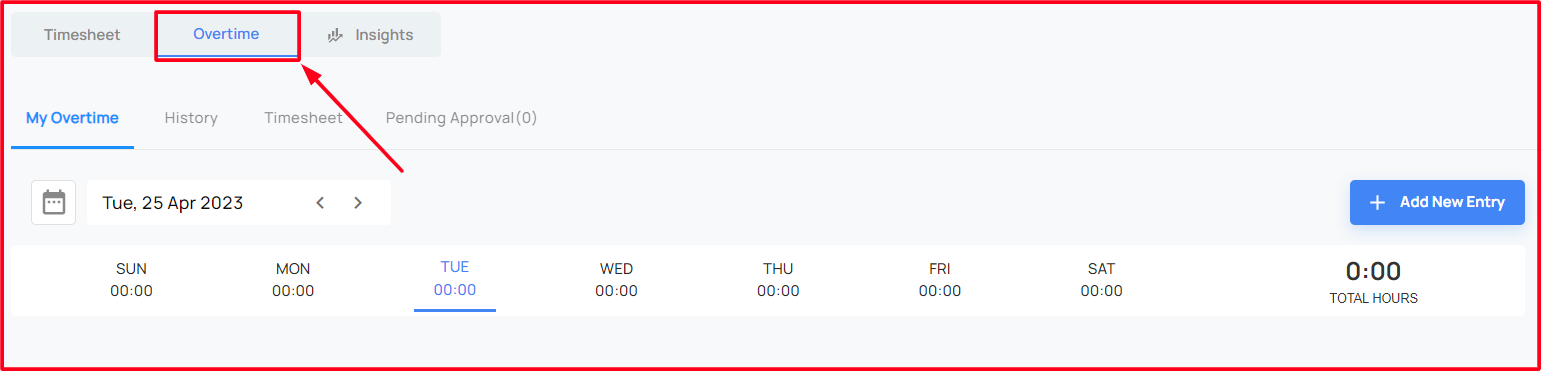
Overtime
- The user has a feature to enable/disable the overtime in the Settings module
- This feature used to enter/manage the overtime working hours details!
Entering Overtime Timesheet
Once the overtime is enabled, then the user able to enter the overtime timesheets like timesheet day entry
Add Overtime Timesheet
To add a overtime timesheet the user can click the “Add New Entry” button from the top right. Then the user can see the popup form
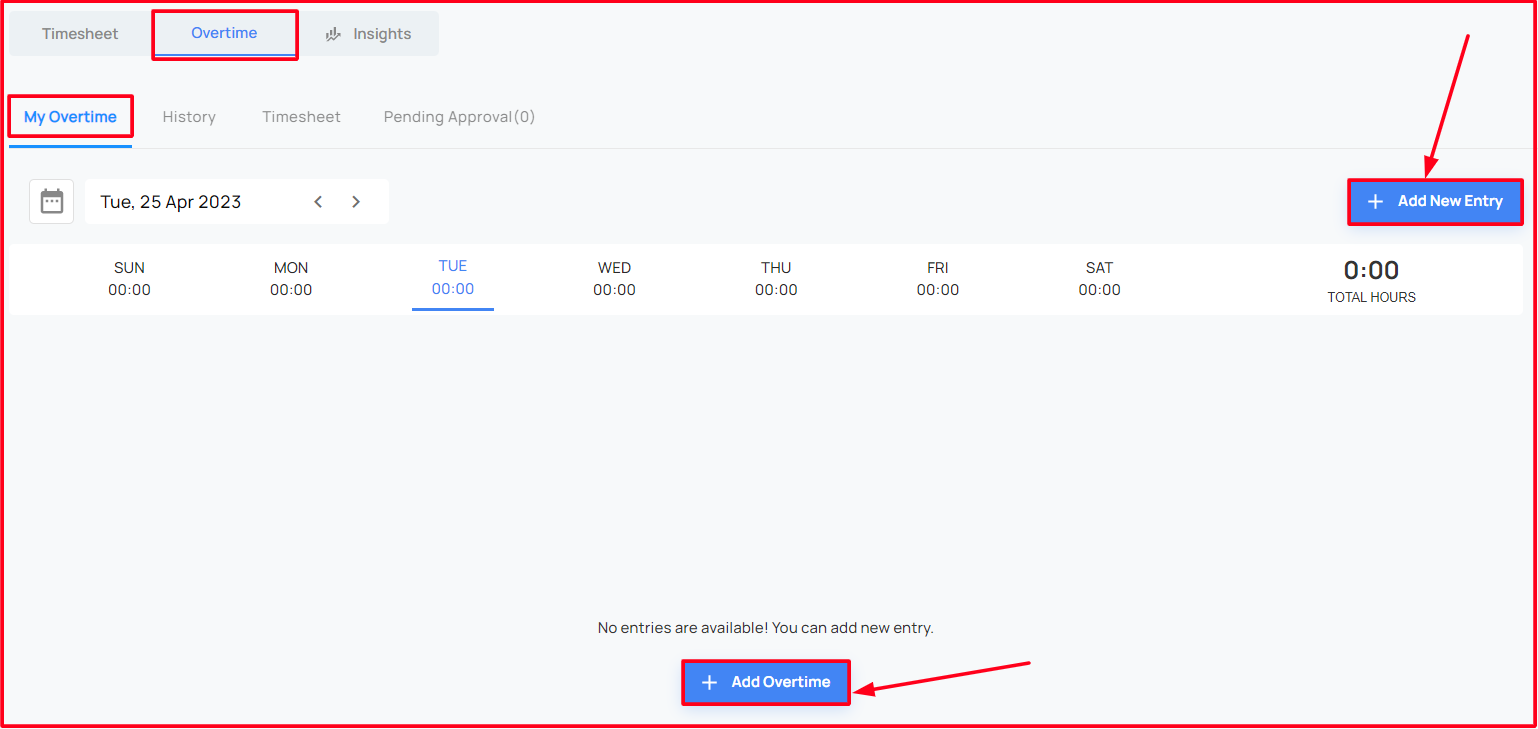
Add Entry Window
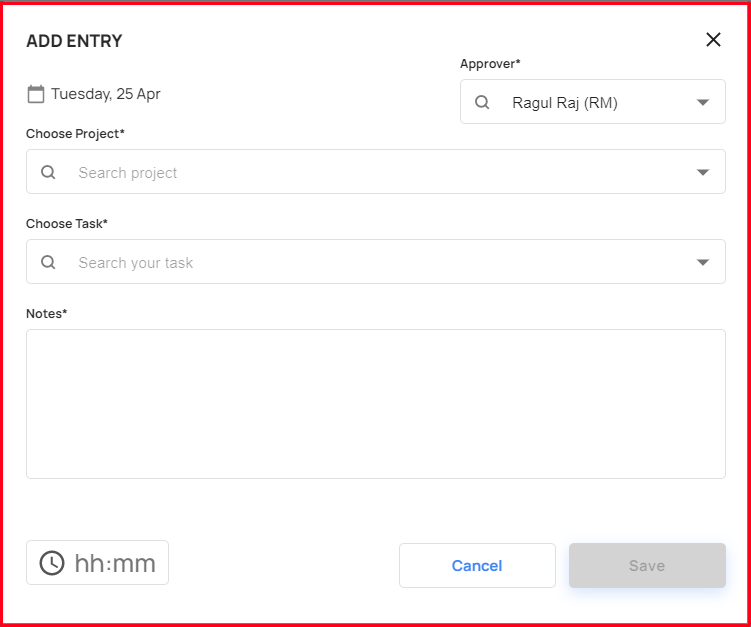
After clicking the “Add New Entry” button the user will see an Add Entry window, please follow the instructions to add a new entry
- Approver (Required)
- The user able to select the approver who needs to approve the overtime timesheet
- Choose Project (Required)
- The user can only see the projects that assigned to the user as a resource
- If there are no projects listed the user can select the “General” option and add time against it
- Choose Task (Required)
- The tasks will list based on what project the user has chosen
- Notes (Required)
- The user can enter some notes as remarks
- Hours (Required)
- The user can add hours to this entry, hours should be in this format “hh: mm” and cannot exceed “23:59 hours”
- Approver (Required)
Edit Timesheet in Overtime
Clicking the three dots button the user will see an Edit option, clicking the edit option edit entry window opened, please follow the instructions to edit the entry
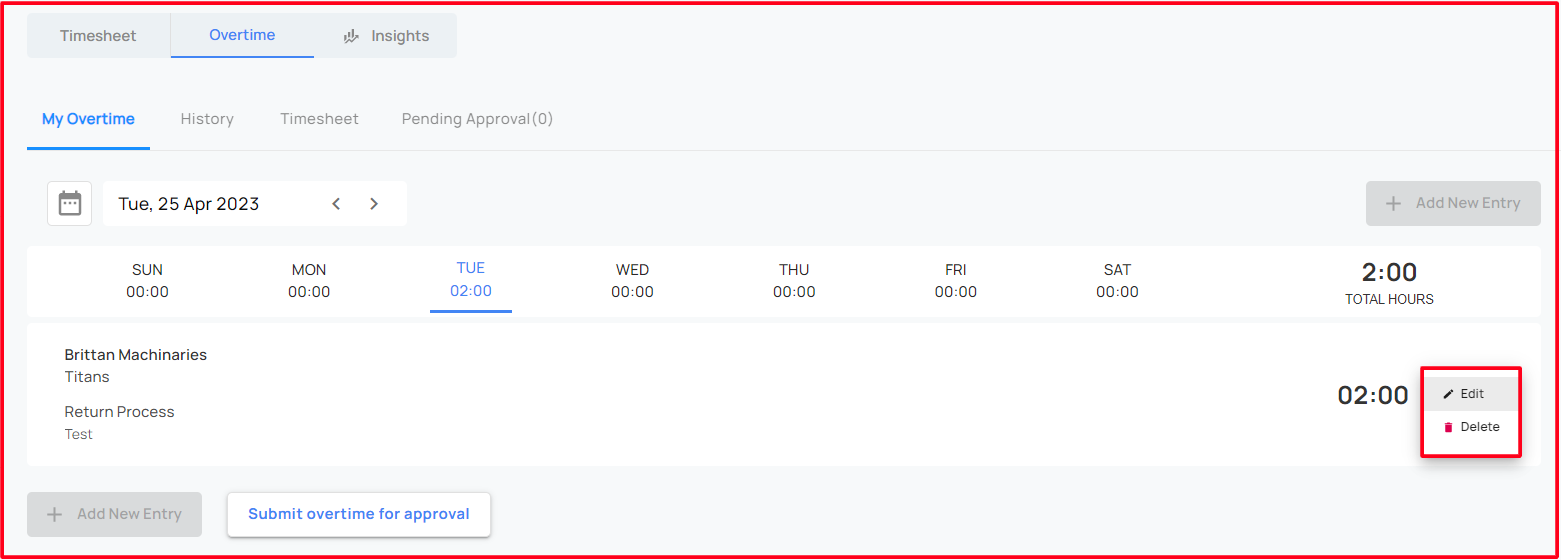
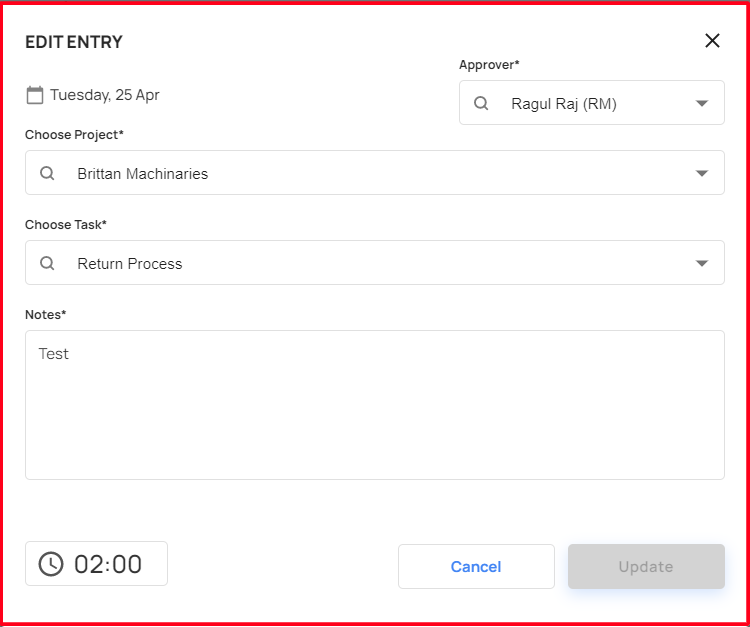
Edit Entry Window
Approver (Required)
- The user able to select the approver who needs to approve the overtime timesheet
Choose Project (Required)
- The user can only see the projects that assigned to the user as a resource
- If there are no projects listed the user can select the “General” option and add time against it
Choose Task (Required)
- The tasks will list based on what project the user has chosen
Notes (Required)
- The user can enter some notes as remarks
Hours (Required)
- The user can add hours to this entry, hours should be in this format “hh: mm” and cannot exceed “23:59 hours”
Delete Timesheet in Overtime
The user can delete an entry by clicking on the three dots from the right, then clicking the delete button
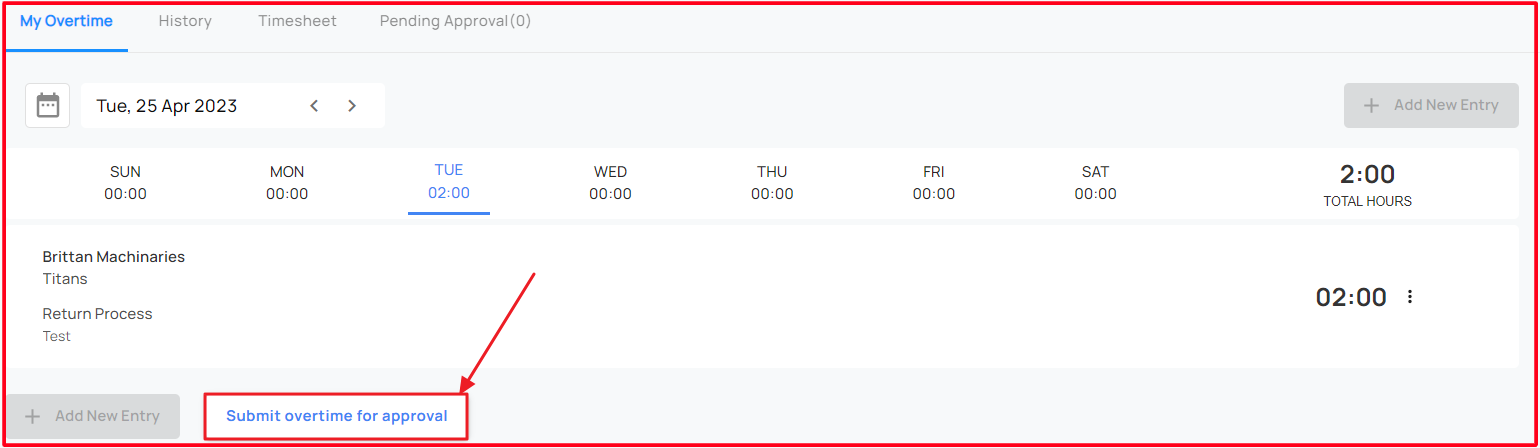
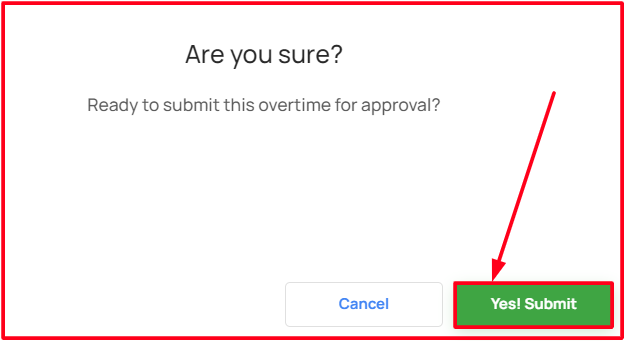
Submit overtime timesheet
The user can easily submit the timesheet by clicking on “Submit overtime for approval” in the day wise
Note: Once the user submits the timesheet then only the system will take hours to calculate
History in Overtime
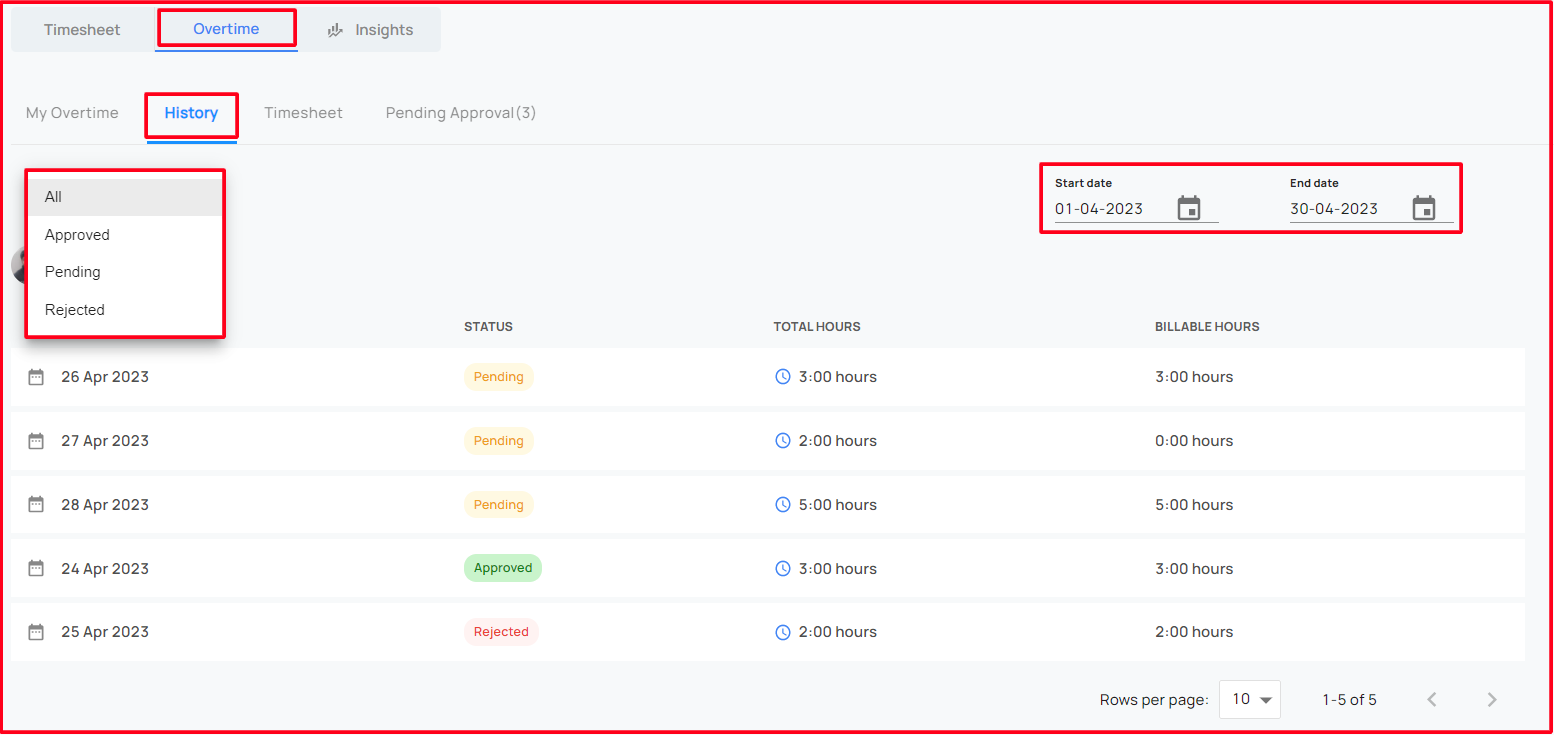
Once the user submitted the overtime timesheet, then can view/ track the status of the overtime timesheet in history section.
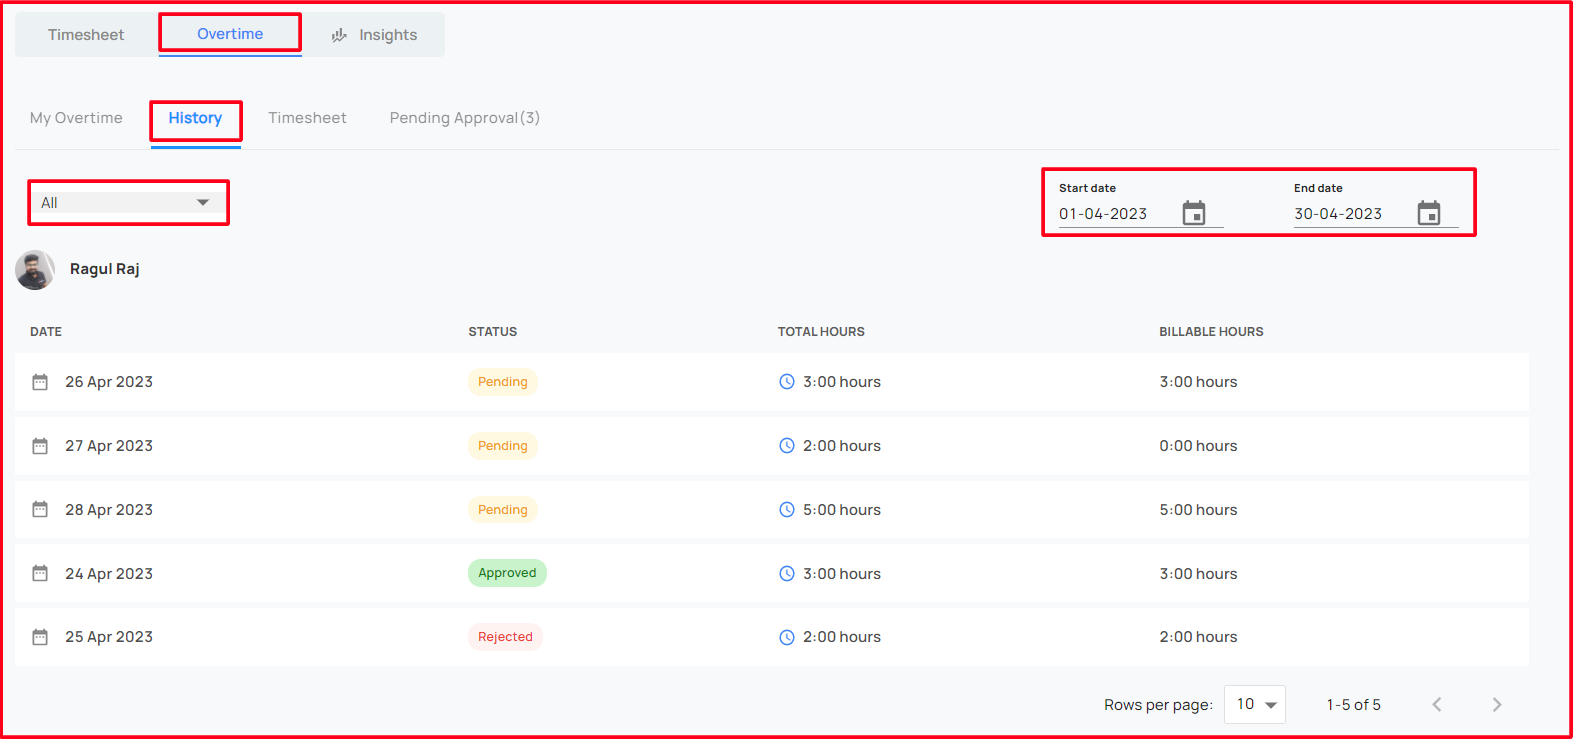
Also the user can view/track the specific status of the overtime timesheet in the history section
Pending Approval in Overtime
Once the user submits the overtime timesheet the reporting manager can view the details in the pending approval section. There the reporter can approve/reject the overtime timesheet
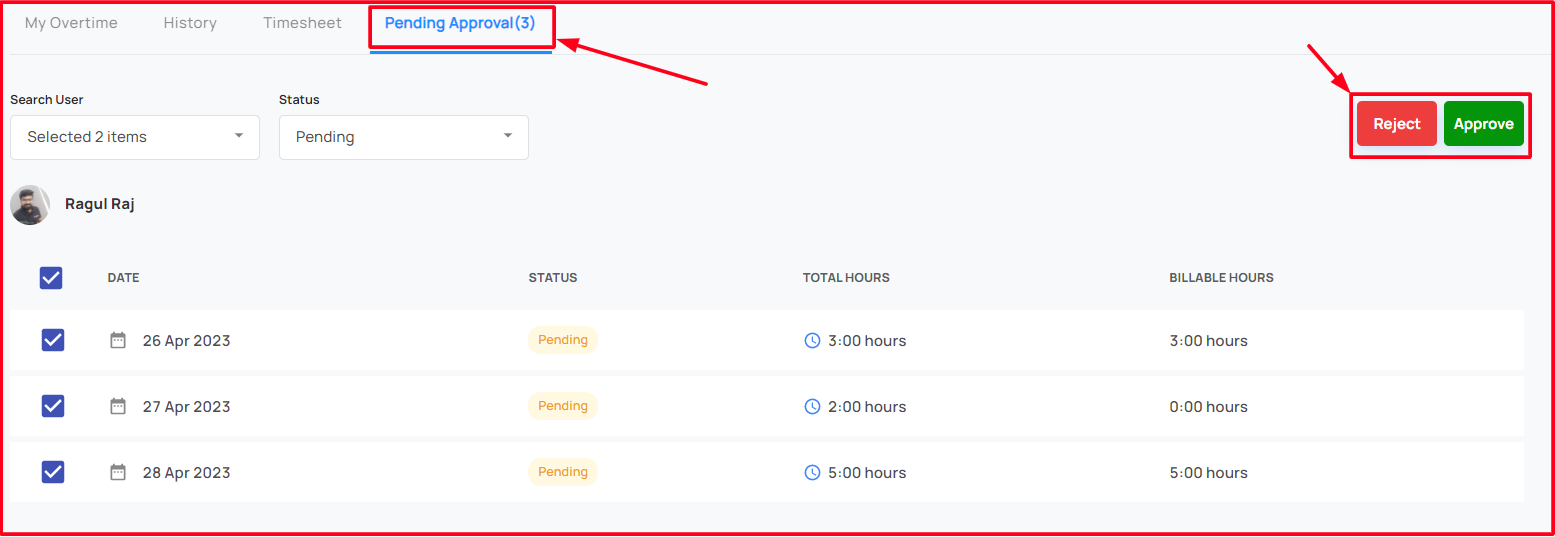
Timesheet Management in Overtime
The admin also approves or rejects the submitted overtime timesheets
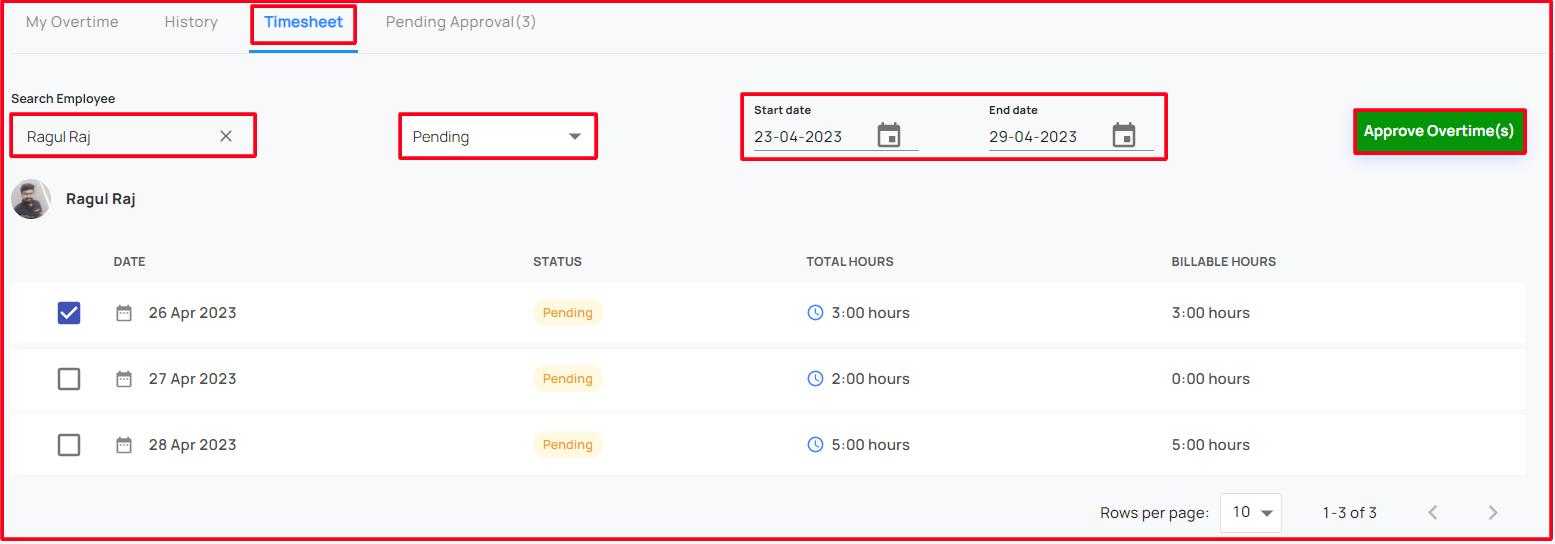
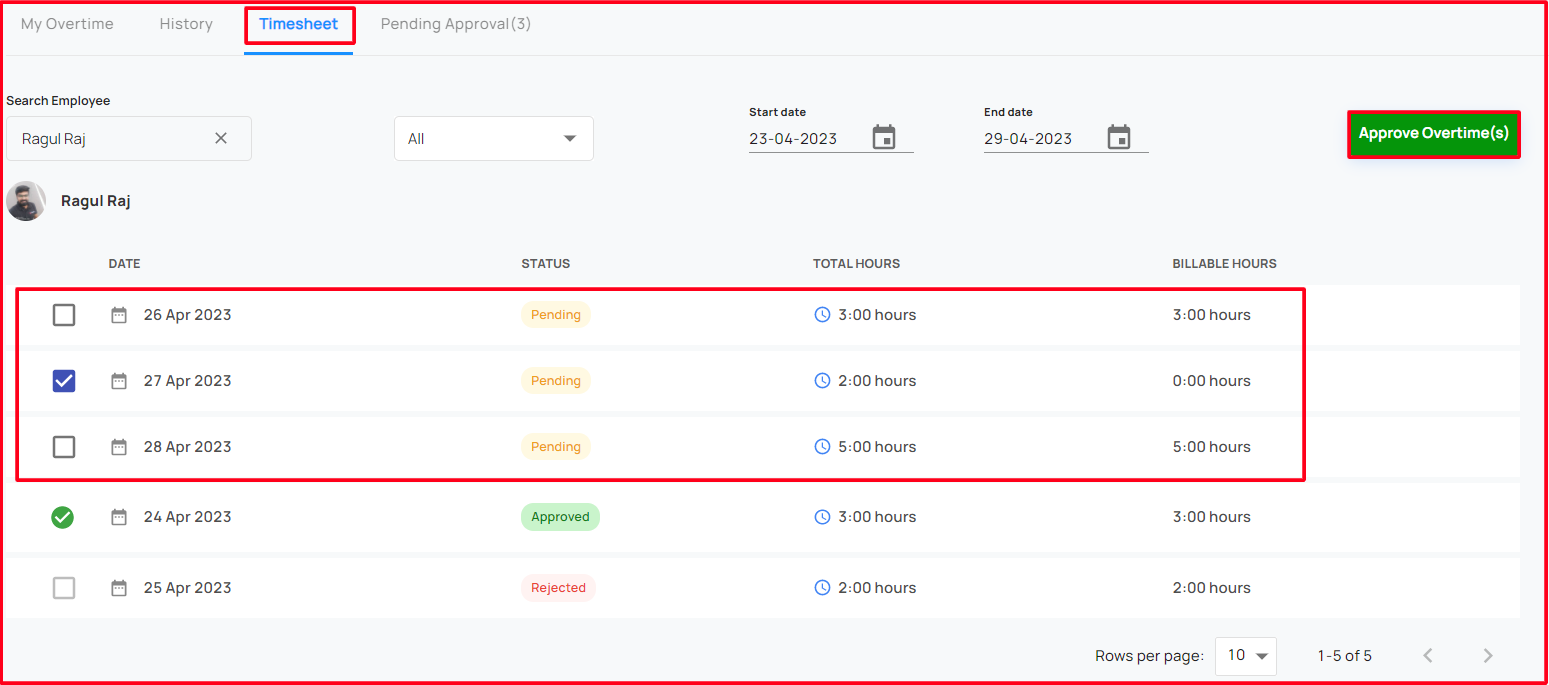
Approve/Reject Timesheet in Overtime
The reporter can click on the overtime timesheet to approve or reject, it will open a popup window
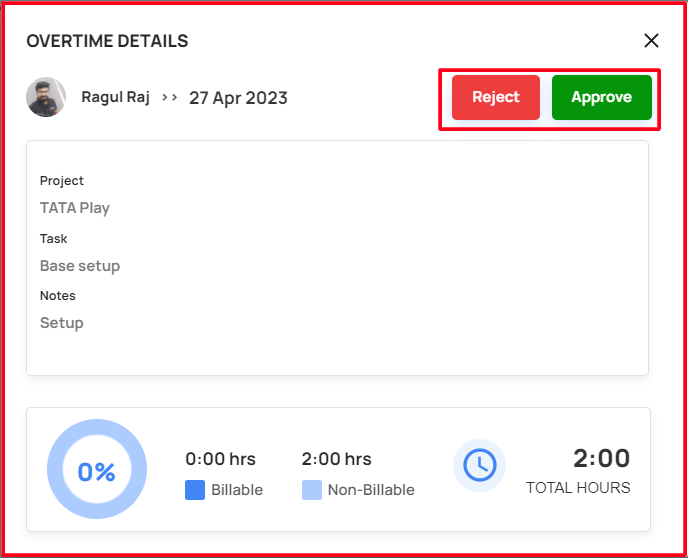
Timesheet Management Popup in Overtime
The admin can approve or reject the overtime timesheet from this window
Insights
This section gives deep and accurate details and visual record of the timesheet section which includes
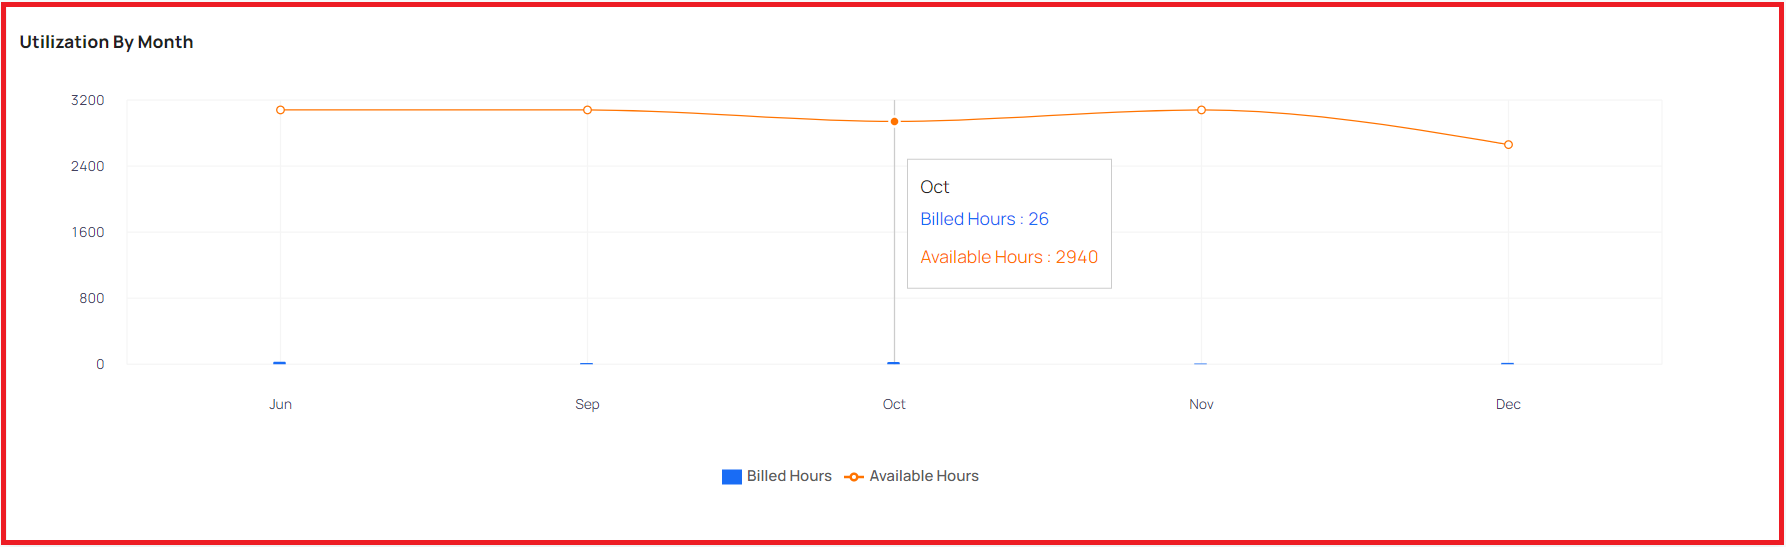
Utilization By Month
The utilization of Billed hours and available hours of the month will be shown
Timesheet: All Resources
Able to view all resources timesheet total hours, utilization hours for the billable & non-billable tasks
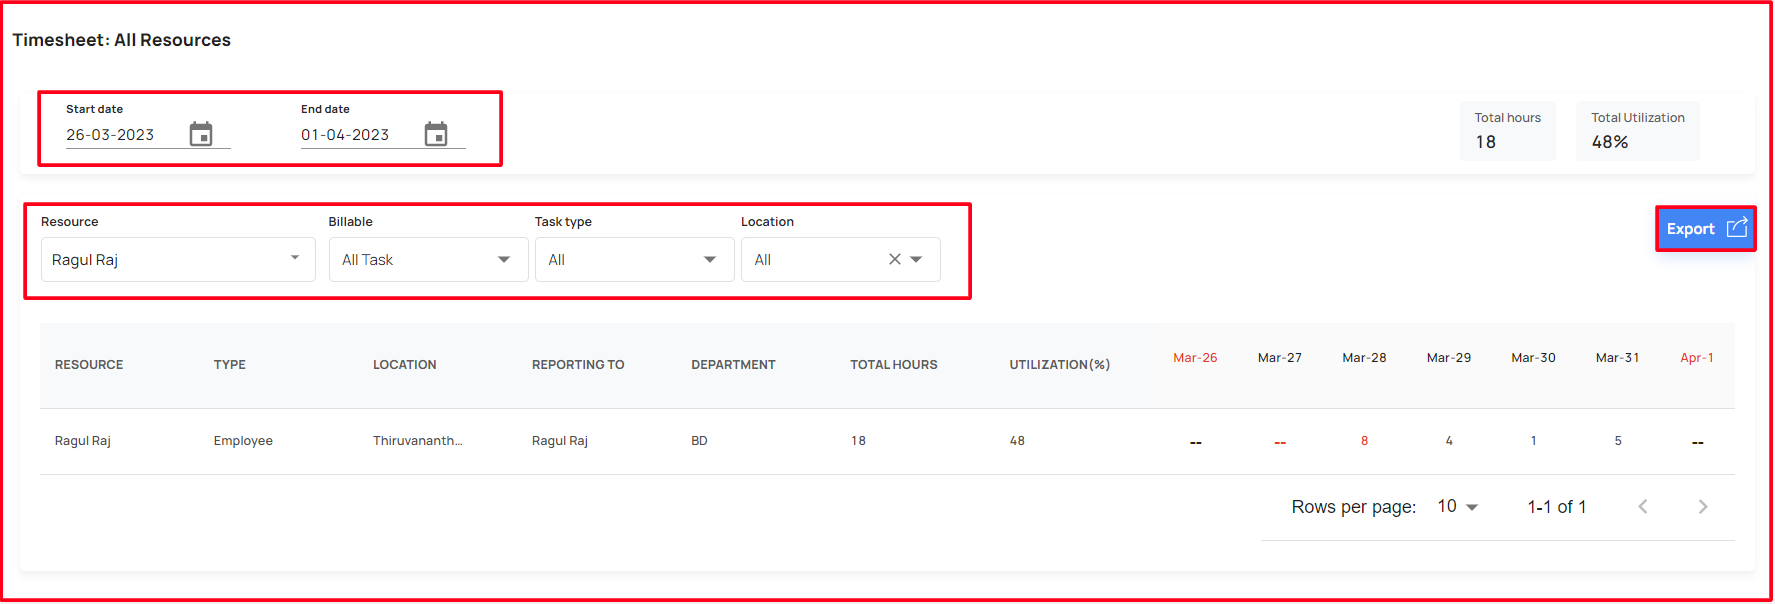
Also able to view the particular resource timesheet total hours, utilization hours for the billable & non-billable tasks
Able to view the start date and end date
Able to change the start date and end date
Able to export the reports
FAQ
Question: Why the project is not showing to me?
Answer:
- Resources should be allocated under that project.
- Project should be “InProgress” status.
- Project end date and resource allocation end date should be greater than the current date.
Question: What is (NB) in the drop-down
Answer: NB means Non-billable